for our Model 3
Mark D Larsen

Going to the Matte
(Click to enlarge)
| Matte Screen Protector
for our Model 3 Mark D Larsen |
Going to the Matte (Click to enlarge) |
Readers might recall that, not long after taking delivery of Correcaminos, I decided to invest in a glass screen protector for the display. I ordered and installed a clear model, instead of the matte alternative, because Tamara doesn’t like to wear her glasses in the car, and wanted the touchscreen’s contents to be as legible as possible. Unfortunately, a few weeks ago, the light just happened to shine on the screen at a certain angle that allowed me to see a crack in the glass. Upon closer inspection, it was obvious that something had smacked the very edge of the display, creating a small chip in the glass that then spread into a crack. My suspicion is that Tamara’s father had accidentally caused that damage with his cane, as he is very aged and has a hard time getting in and out of the car. We could still see the screen just fine, despite that crack, but… knowing it was there now nagged at me, and I resolved that I would just have to replace it.
I really liked that clear screen protector, primarily because it was so easy to clean fingerprints and smudges off of its oleophobic surface. However, it did have the disadvantage of reflecting glare from the outside, depending upon the angle of the light. This didn’t really bother me at the time, since there was nothing to see on the screen but the car controls and navigation. However, ensuing upgrades made it possible to view DashCam and Sentry clips on the display, as well as YouTube, Netflix, Hulu, web movies, plus numerous video games. In such instances, the glare can prove distracting and annoying. Moreover, what we discovered is that Tamara can’t read any fine print on the display anyway, despite how crystal clear the glass protector is.
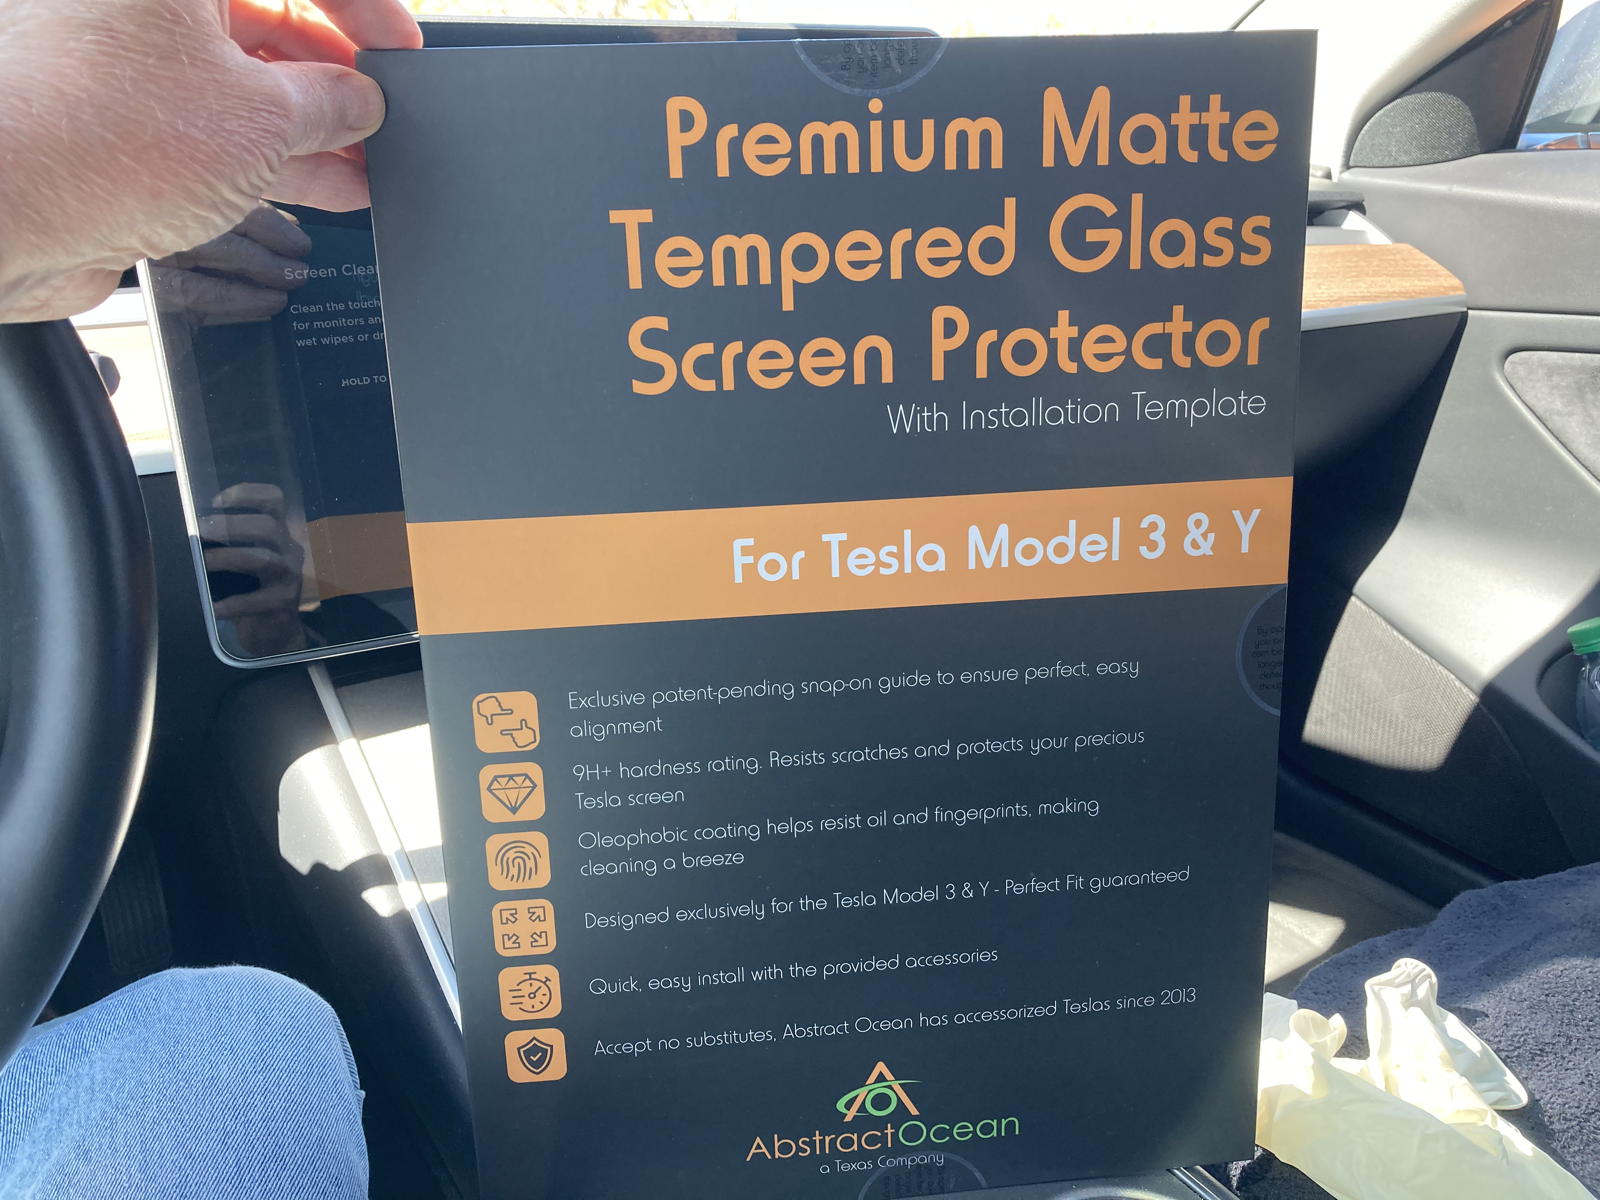
To make a long story even longer, I consequently decided to order the matte alternative instead from the very same vendor, Abstract Ocean, because their screen protectors are made of 9H tempered glass. It didn’t take long for the replacement to arrive, and I describe below the installation process:
NOTE: You can click on any of the following photos to enlarge them.

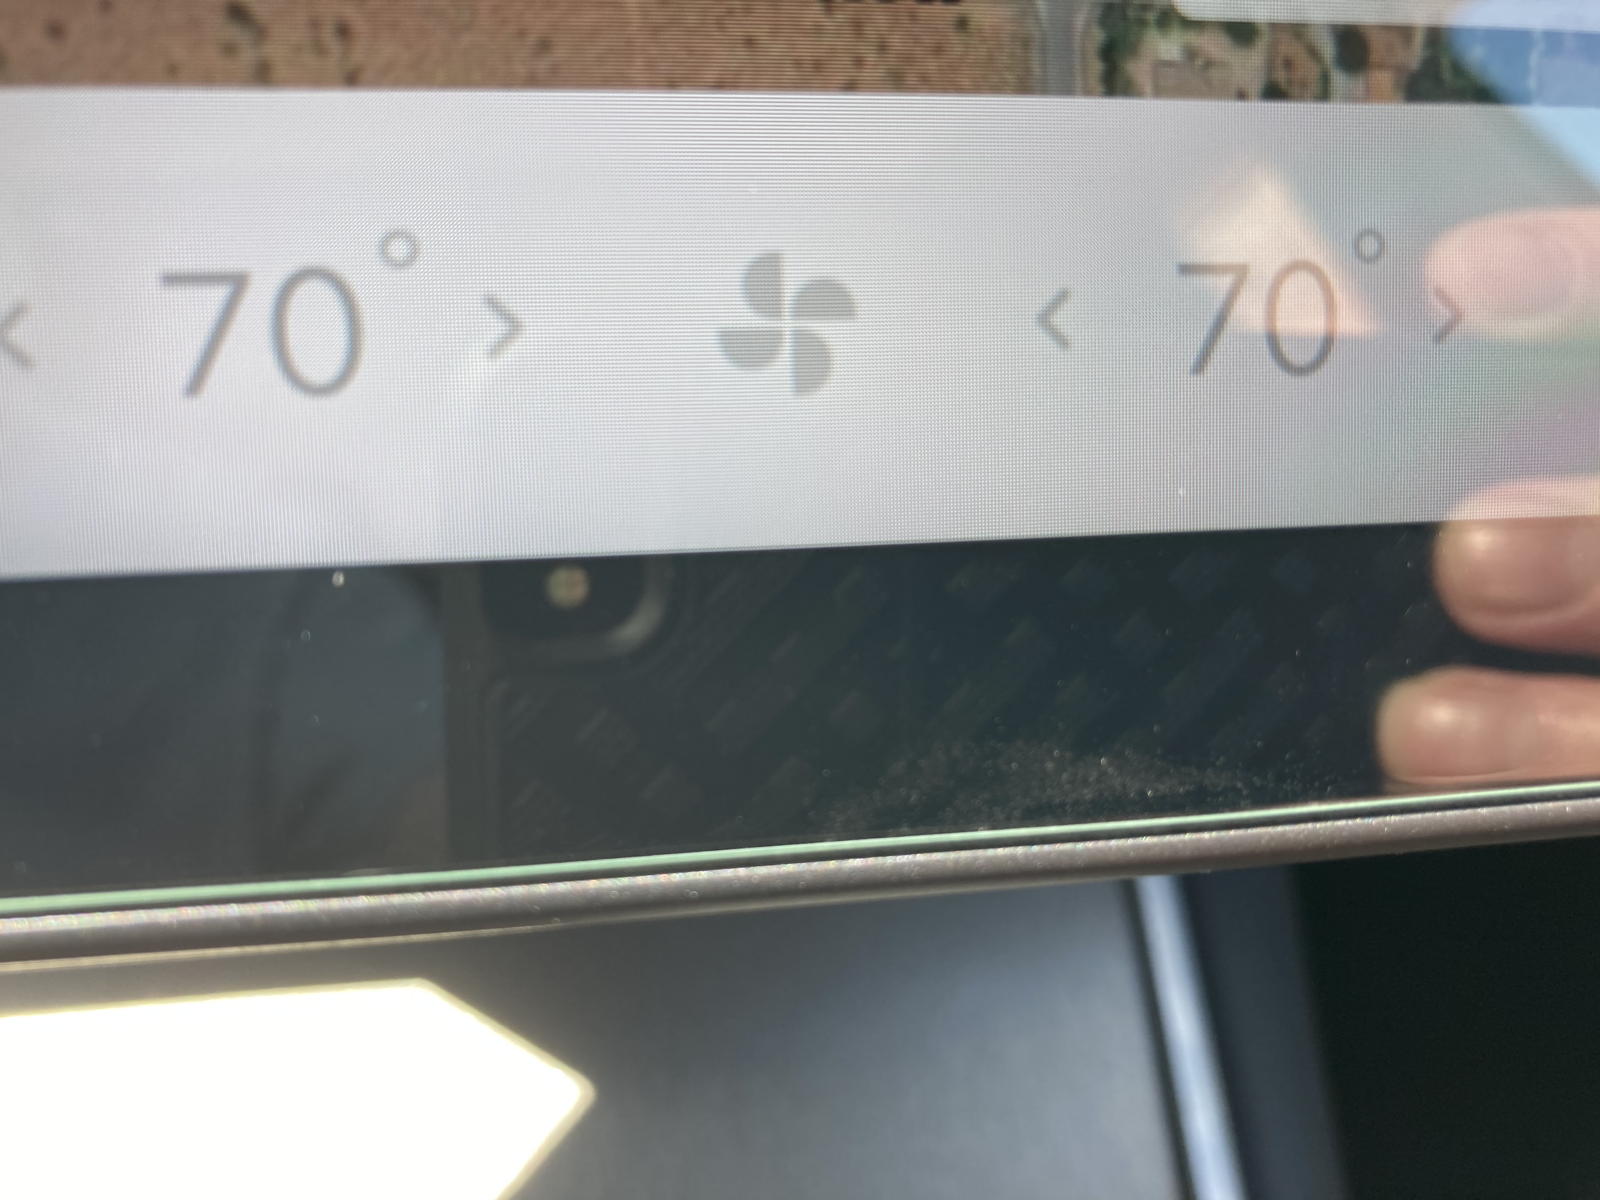
Here is a close-up of the crack that I noticed in the clear glass screen protector. I suppose I should count my lucky stars that the protector had taken the hit. It had done its intended job. Without it, the touchscreen itself might have been broken!

Here is the package with the matte screen protector. Abstract Ocean has posted an instructional video on how to install this product, and I would encourage anyone considering this product to watch it.

After cleaning Correcaminos’ interior as best I could, I pulled out of the garage into the driveway so that I could see the screen clearly in the daylight. I then turned off the climate control to avoid having any dust swirling around in the cabin.

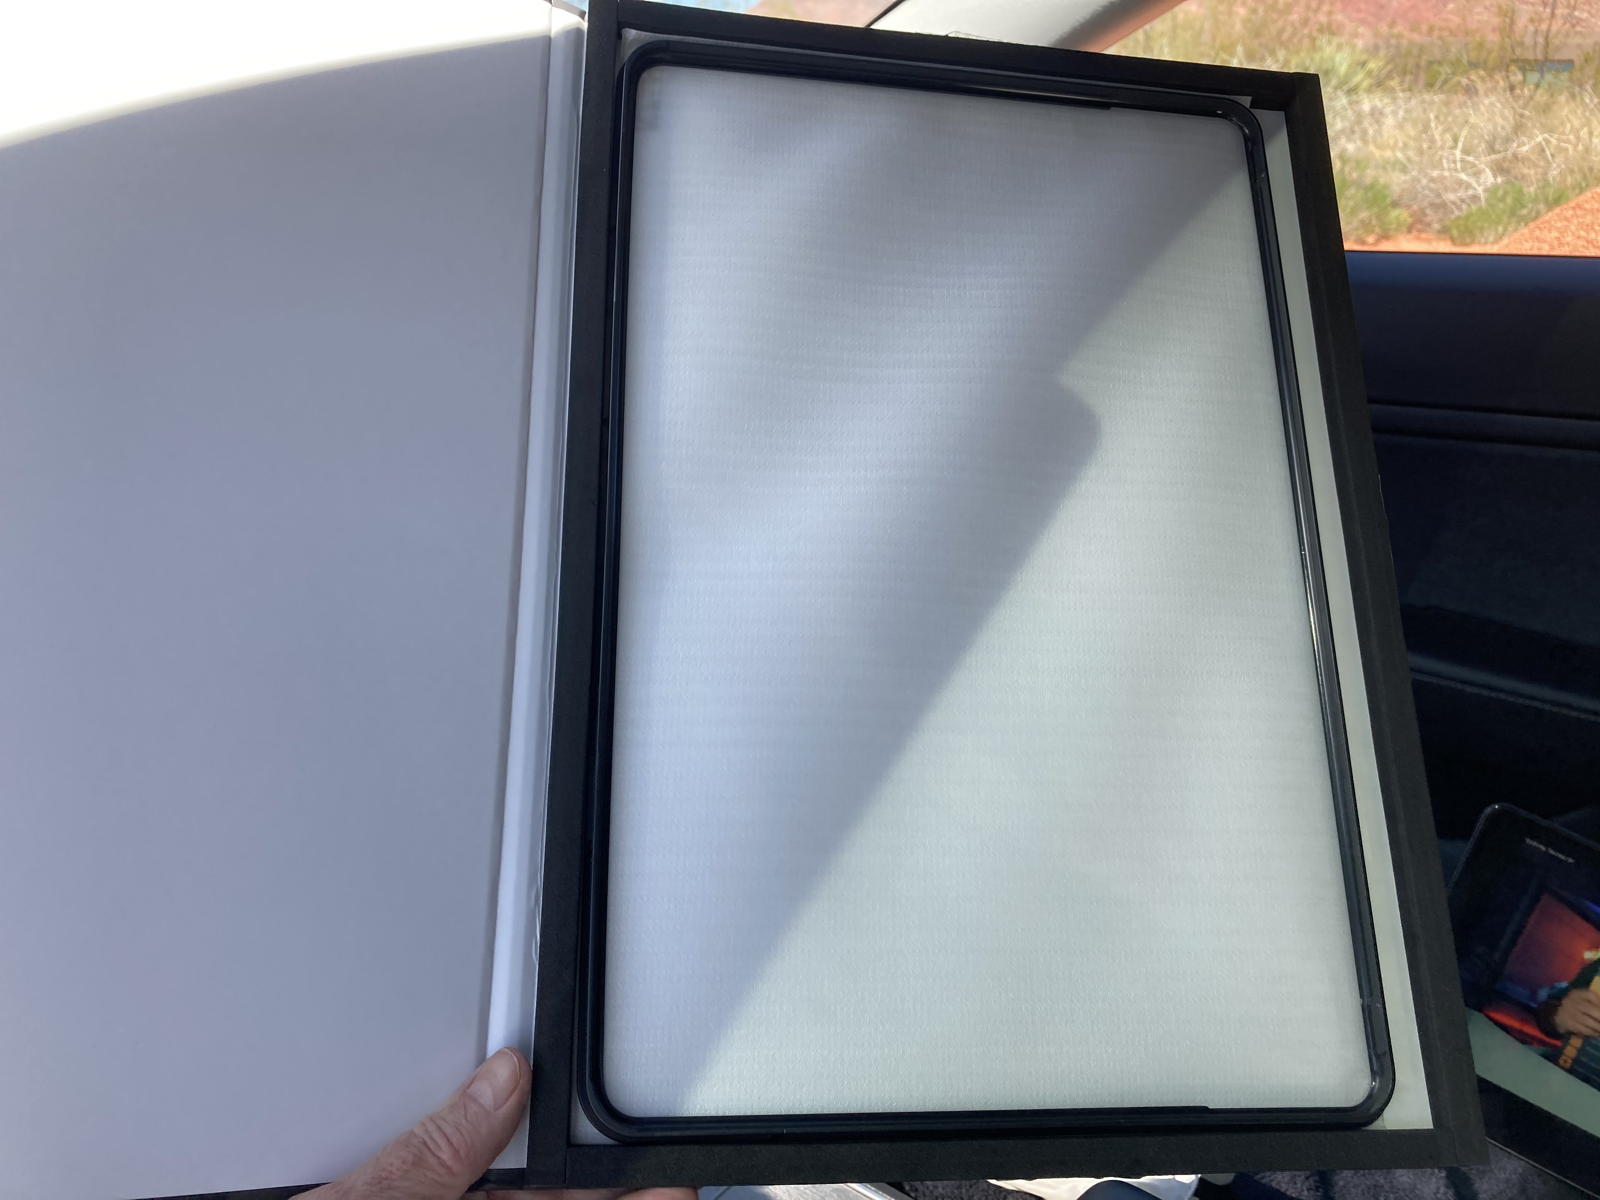
A helpful change with Abtract Ocean’s latest screen protectors is that they no longer use tape “hinges” to lower the glass onto the screen in proper position —like I had done previously with the clear protector. Instead, they supply a guiding frame that mounts around the edges of the touchscreen —a much better solution!

The first step, of course, was to remove the damaged clear screen protector. I pried up a corner, started to peel it off, and I could see the crack more clearly as I lifted it.

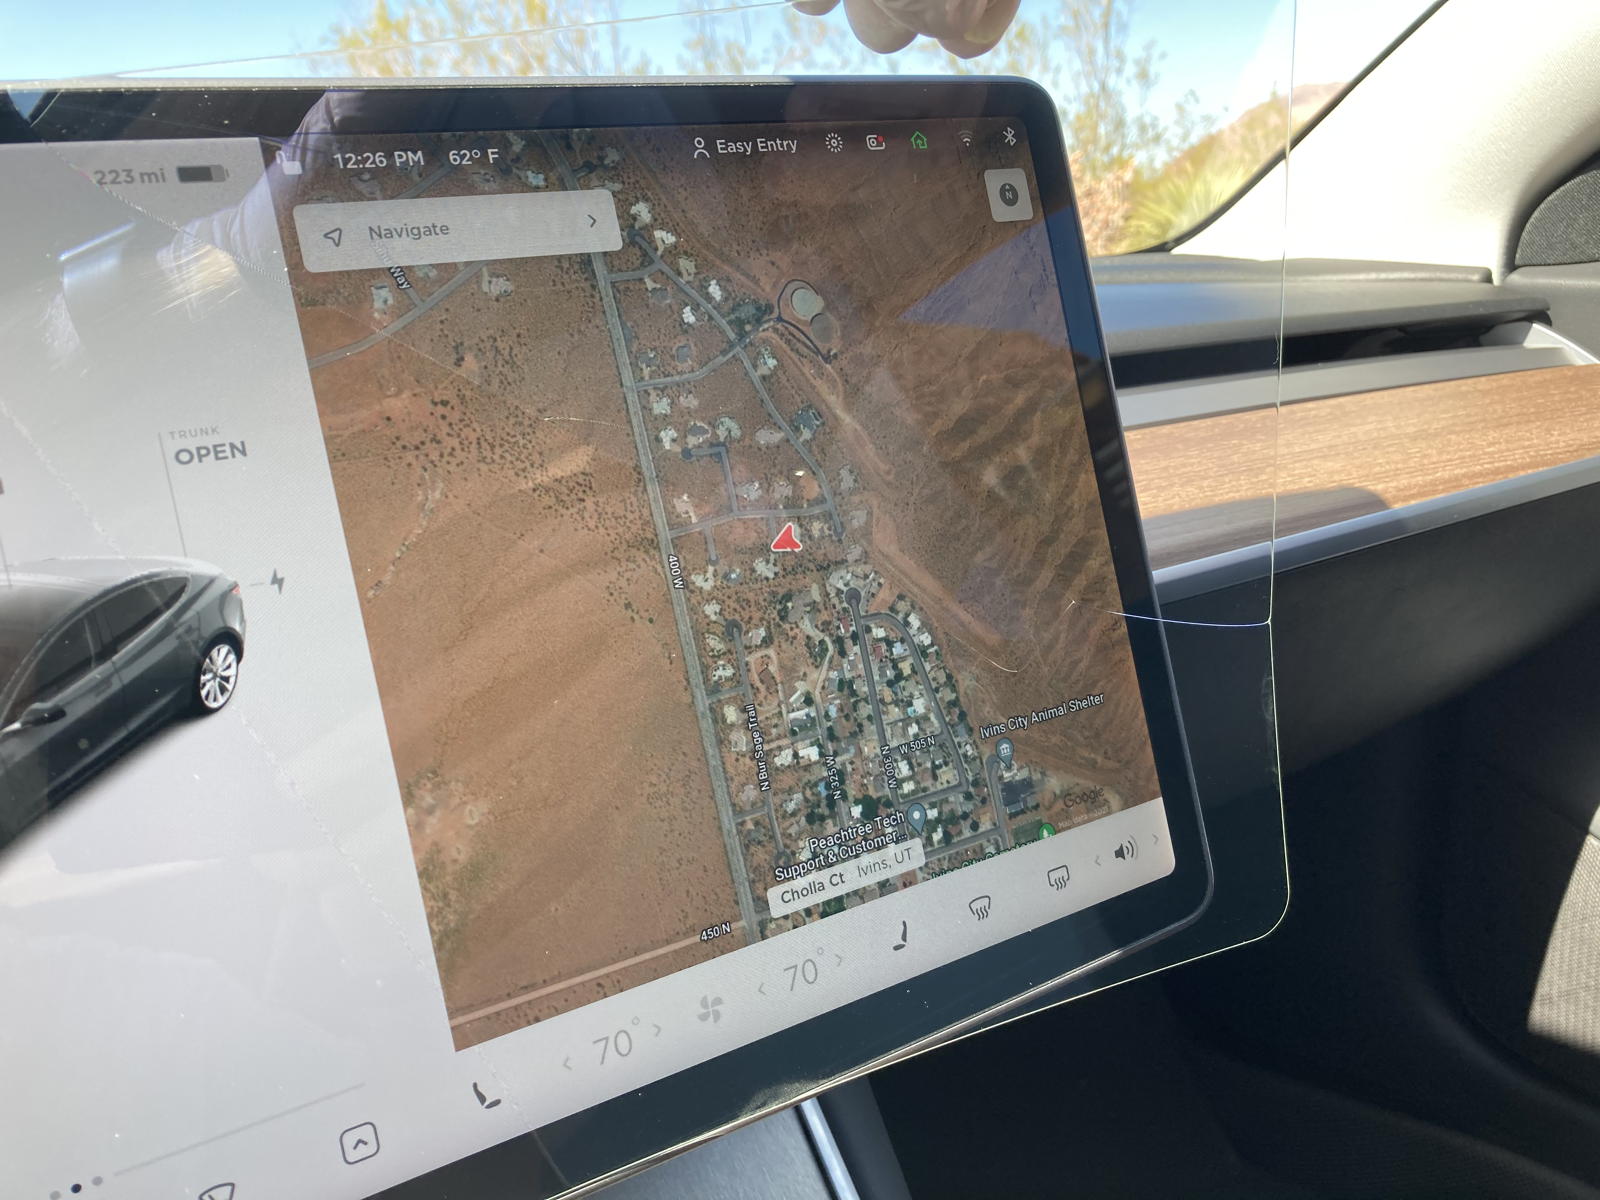
Indeed, the crack was larger and more pronounced than I had realized, branching into more cracks all the way across the glass.

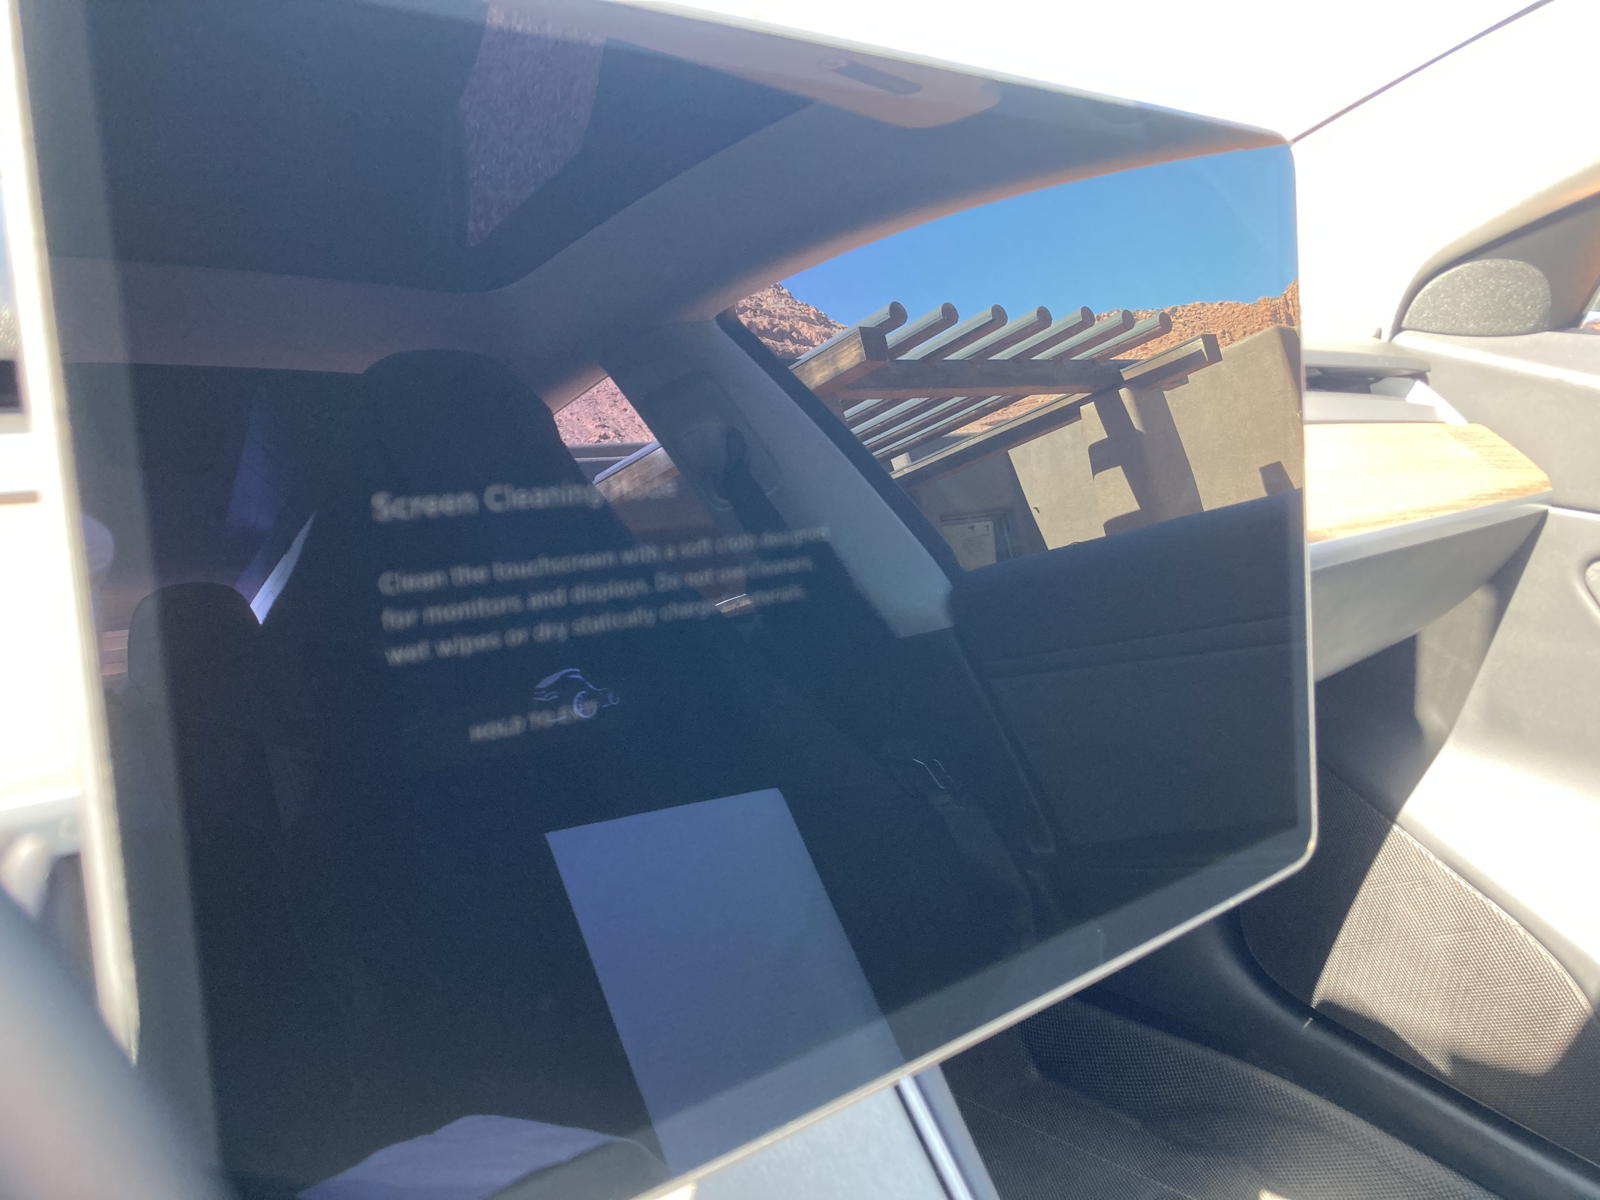
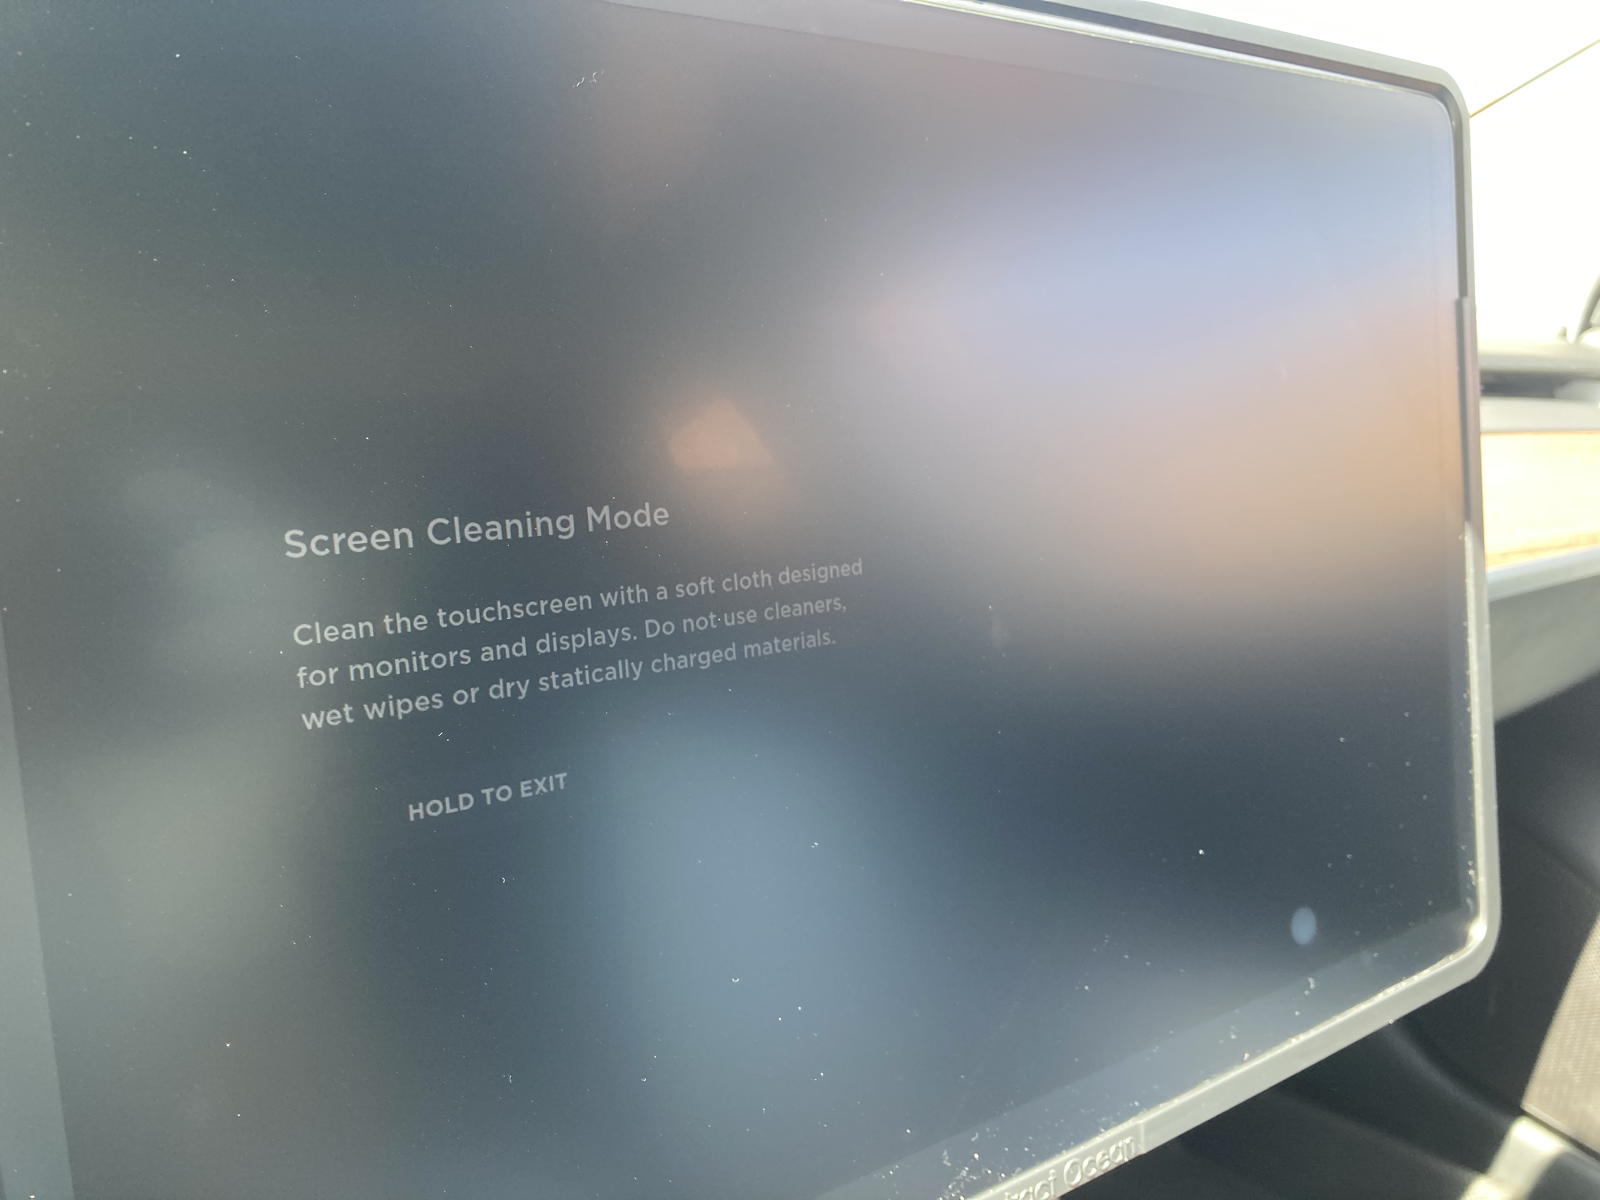
I opened the display control setting and enabled the “clean screen” mode. Here is what it displays prior to installation, and you can see how much glare it reflects from the outside through the car’s windows.

I carefully cleaned the touchscreen and dabbed at any errant dust particles with the supplied sticky tabs. Thanks to the provided frame to guide me, I then managed to place and install the matte protector without a hitch. You can see how much it reduces and blurs the outside glare. By the way, do not be concerned about the dust particles in the enlarged photo: they are on the outside of the screen protector, not underneath it.

Here is a photo of the touchscreen’s startup display before installation.

And here is the same shot with the matte protective screen installed. What a difference it makes!
I admit: I like this matte protector much better than the clear one. The touchscreen images and text are still legible, and in fact easier to read without the glare making you squint and shift your head around to get a good view. I had assumed that the matte finish might feel rougher, but I was wrong: if I’m scrolling by dragging my finger on the screen, it actually feels smoother and more responsive than the clear protector. Maybe the matte finish has less surface under fingertips, and thus causes less friction…? Dunno, but I’ll take it! I’ve also noticed that fingerprints are not as noticeable on the matte glass, yet they’re just as easy to wipe off as with the clear model.One thing I learned is that it would be best to install these screen protectors in cooler temperatures. With the climate control off, and the temperature that day at 82°F, the cabin and screen because fairly hot. I noticed, for example, that dabbing off dust particles would leave a bit of the pads’ glue on the screen, apparently melted from the heat. Moreover, it is harder to squeegee out any bubbles until the screen cools down. I would therefore recommend performing the installation in the early morning and in a shady spot.
Most important of all, I now know the touchscreen itself is again safe from damaging mishaps. Let’s hope a similar accident doesn’t happen again.