Rack ‘em up!
(click to enlarge)
June 5, 2014
Mark D Larsen
|
Rack ‘em up! (click to enlarge) | EcoHitch
June 5, 2014 Mark D Larsen |
Having upgraded our bicycles to e-bikes, the next logical project was to install a hitch on my Leaf to accommodate the bike rack that we bought years ago for our “workhorse” Subaru. Of course, Nissan does not recommend using the Leaf to tow trailers, but hauling a couple of bikes on a hitch carrier is hardly different than with a roof or hatchback rack.
I had researched the possibilities, and finally decided that the best solution was the TorkLift EcoHitch for the 2011-12 Leaf (the 2013-14 model is different). It has two advantages that other hitches lack. First, there is no drilling required to mount it. Second, it has a “stealth” design that fits inside the Leaf’s undercarriage panel, and thus has minimal effect on the vehicle’s aerodynamics. I ordered the 11/4" model to fit our bike rack, and it arrived about a week later.
The black-and-white photos in the included installation sheets were fairly dark, making it difficult to see the holes, bolts, and plastic clips very clearly. I sent an e-mail to Torklift to inquire if they had a electronic copy of the document, and they promptly sent me the original file with color photos. I also asked about some apparent contradictions between the photos and their corresponding instructions, which I’ll describe below.
NOTE: You can click on any of the following photos to enlarge them.

After unpacking the box, I was impressed that the EcoHitch is a rock-solid, well designed piece of hardware.

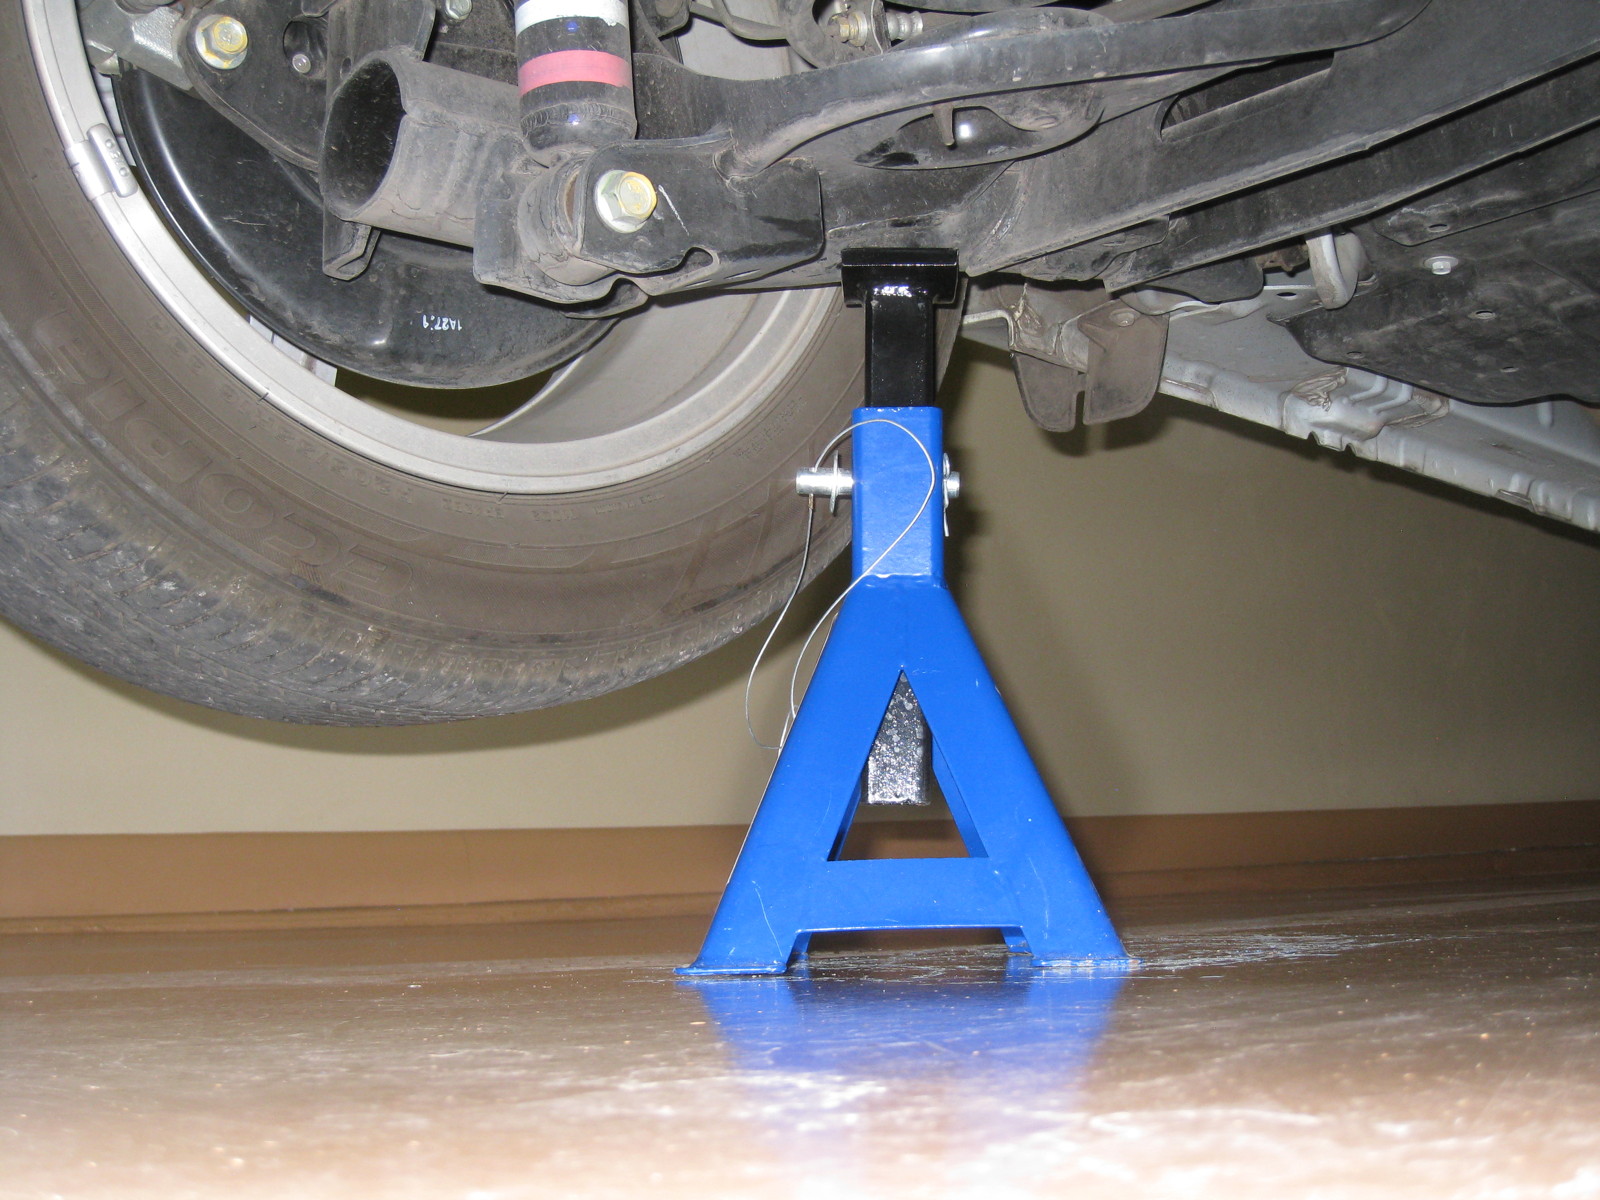
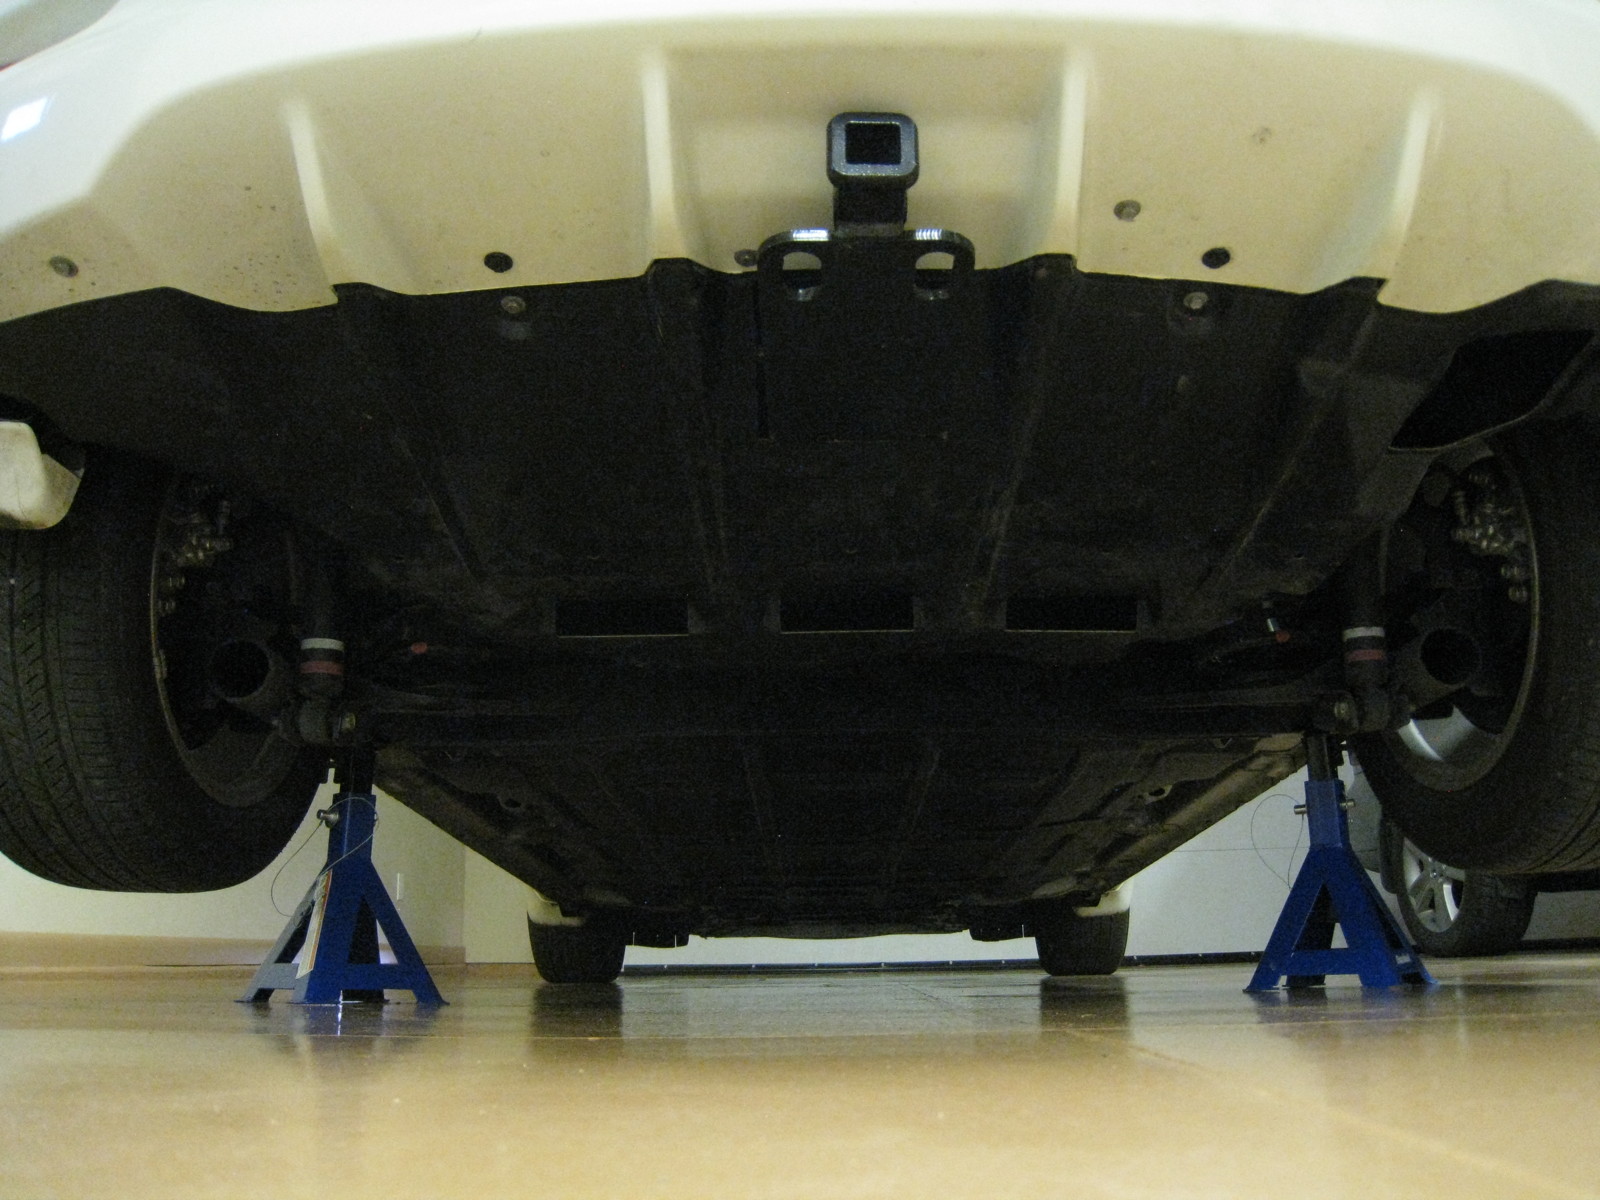
My Subaru’s scissor jack fit the Leaf just fine to raise the rear wheels off the floor, and I then put my jack stands underneath both sides to hold the vehicle securely while crawling underneath to install the hitch.

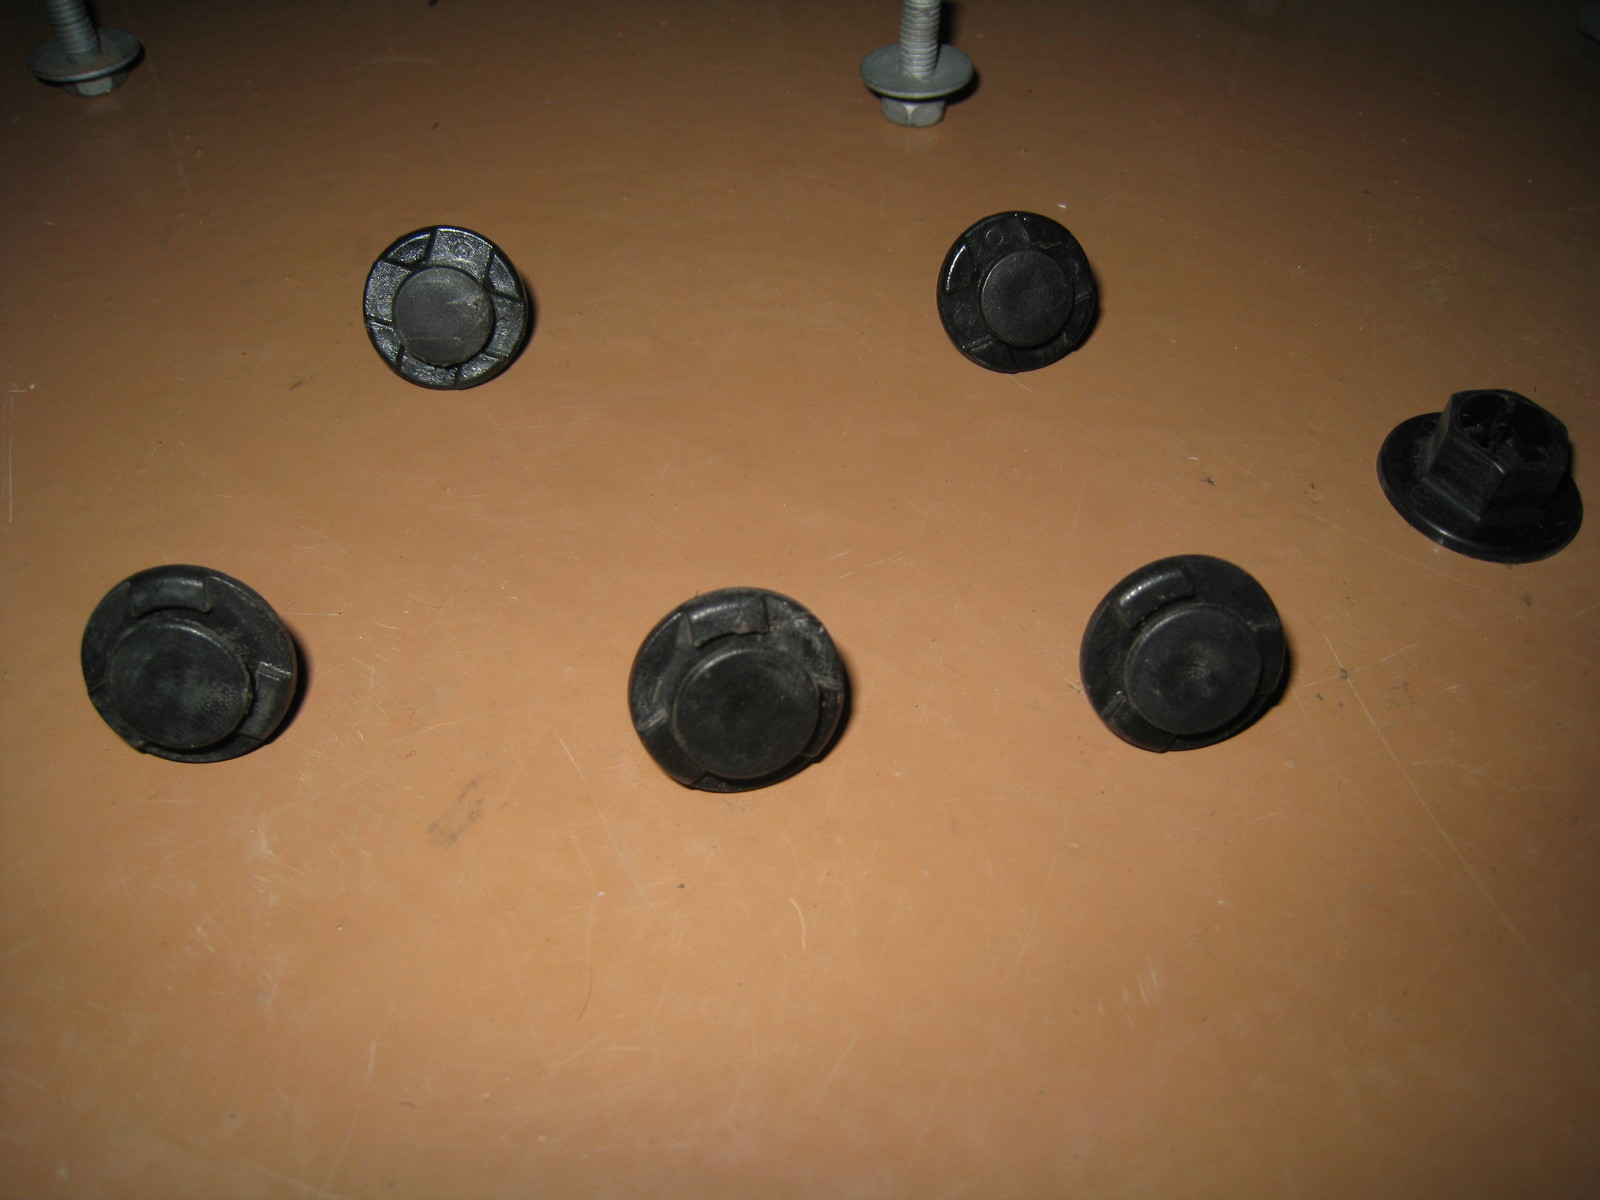
I was puzzled by the plastic clips that held the undercarriage panel in place. They had slightly recessed notches that would spin, but not unscrew. Prying the clips with a screwdriver did not work either.

However, I finally figured out the method to Nissan’s madness. The center of the clip is a “stem” that you pull out to release the clip. Conversely, when you reinstall it you insert the outer rim and then push the “stem” through it to lock the clip in place.

I found that there were five such clips in the panel. The two on the back end had four notches, and there were 10mm bolts in eight more holes. Oddly enough, the three clips on the front end were larger, with three notches, and there was also one 14mm plastic nut on that end, shown on the far right above.

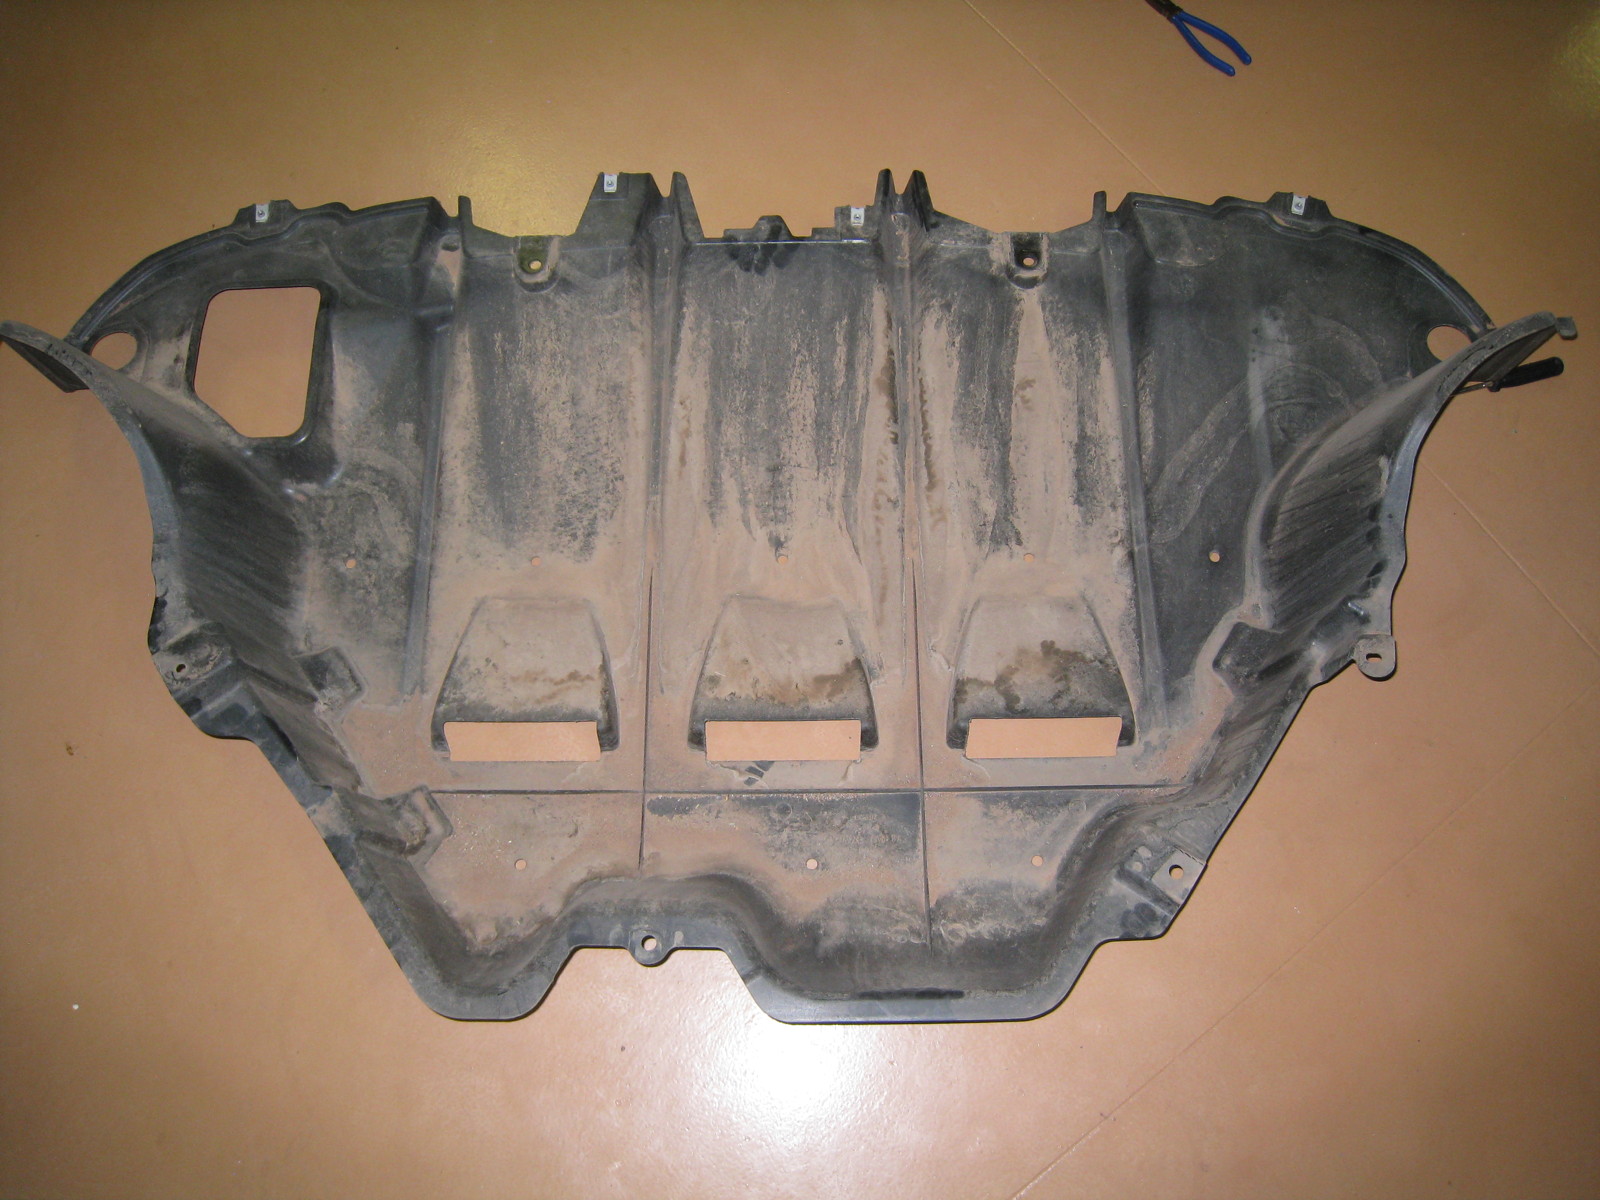
After taking out all the clips and bolts, I could bend the edges and ends of the panel enough to remove and lower it. To my delight, I ended up with dust and grunge in my eyes, nose, mouth, and hair as it came loose. Little did I know how much crud must swirl up inside that panel while driving, evidently through the vent holes and the opening at the top left for the factory tiedown.

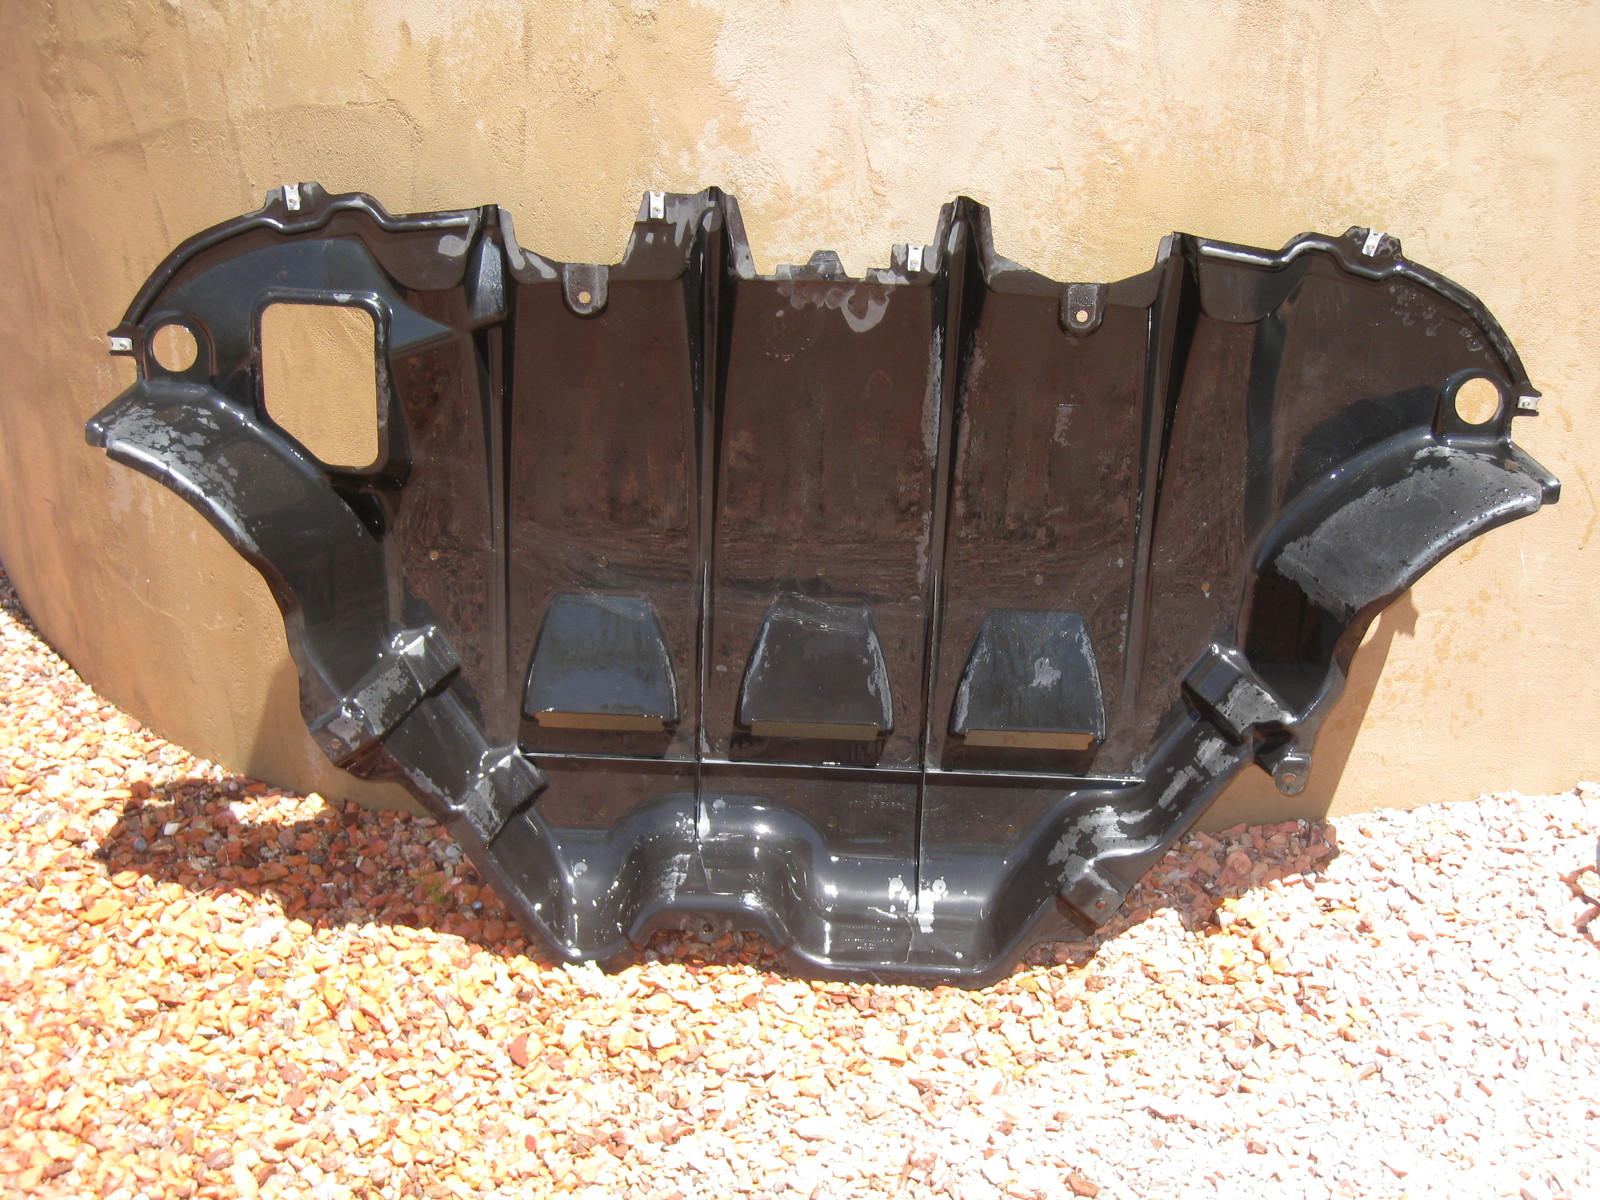
I took the panel outside and hosed it off so that I wouldn't have to savor a second helping of dirt when reinstalling it. I don’t think I’ll hold my breath that it will stay clean, however. I then had to remove the factory tiedown itself, because the hitch has a vertical plate that installs in one of its three holes.

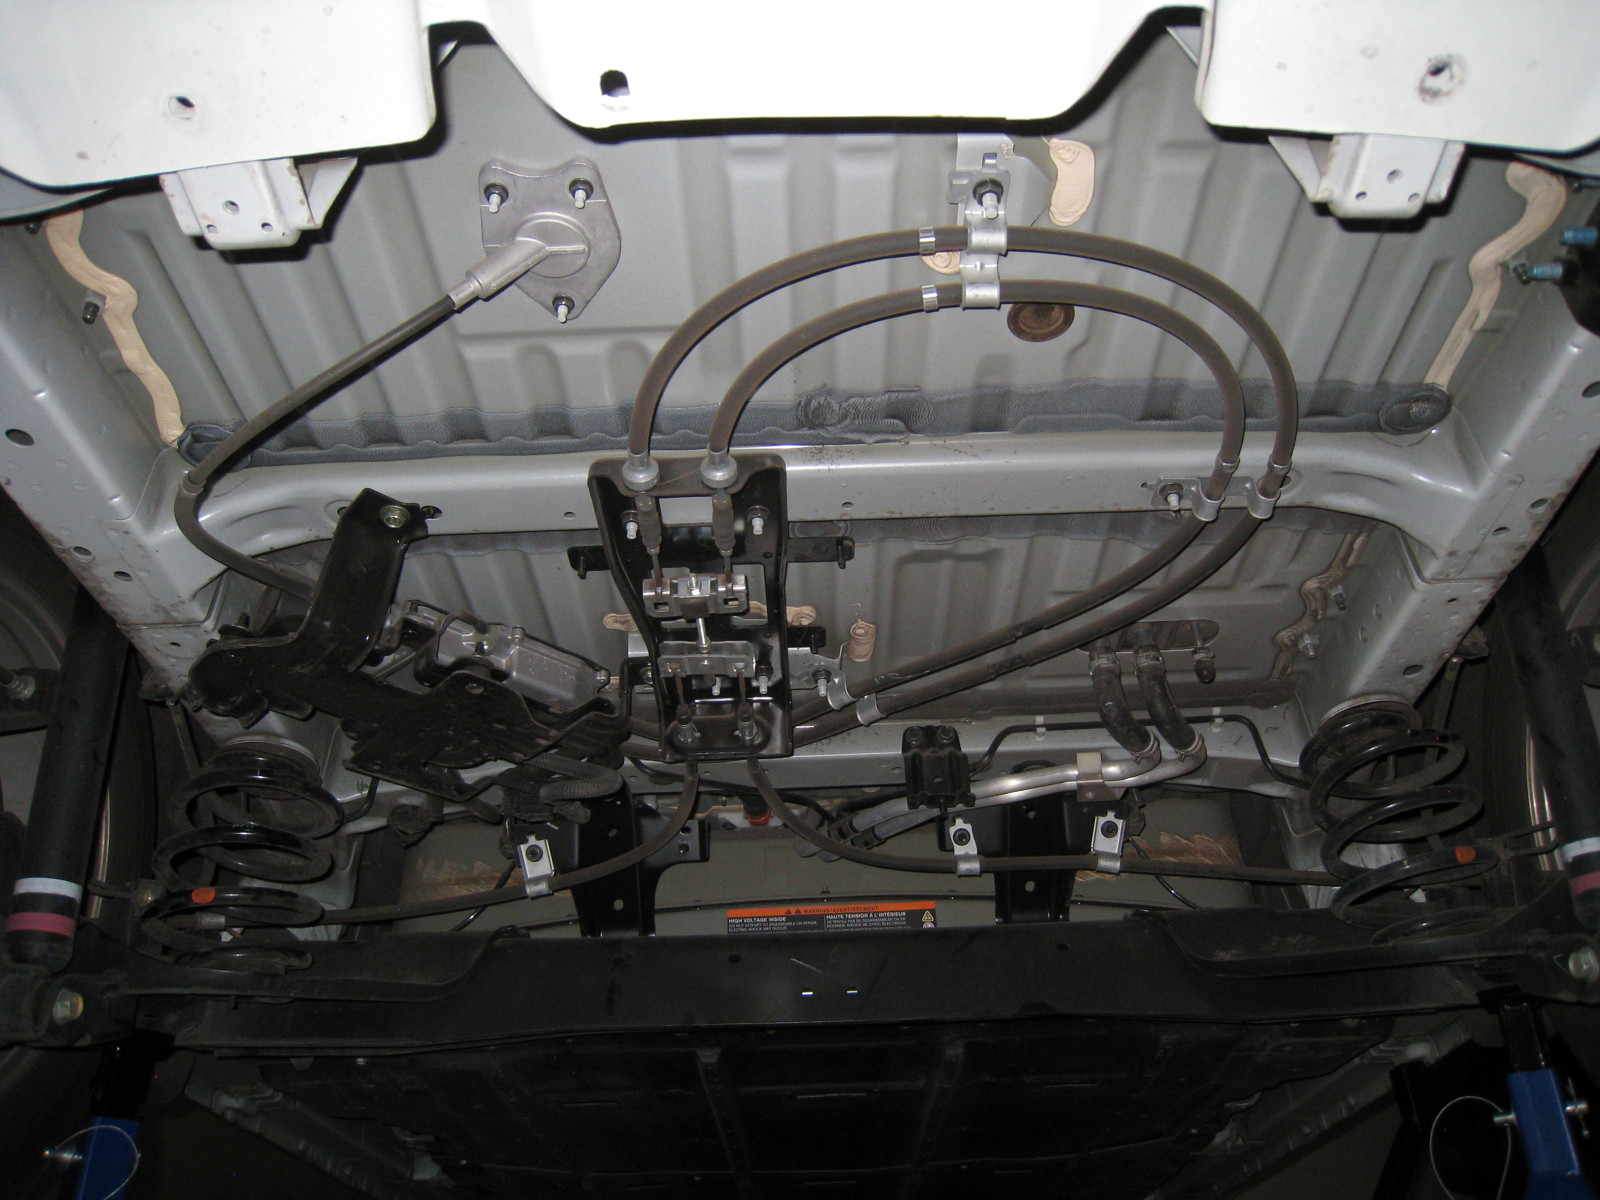
Here is what is under the undercarriage panel. I have no idea what all the hoses are for, but can guess that those leading to the wheels are likely lines to the rear brakes, and the contraption in the middle that connects them might engage the electronic parking brake. My Leaf’s charger is above the chassis in the cargo area, so I would imagine the other line might lead to it...?

It is a tricky manuever to install the bolts for the hitch. I had to use a “fishing” tool with a spring on the end to feed the bolts, mounting plates, and star lock washers up through one large hole in the frame and then pull them back down through their designated smaller holes. As you can see, I temporarlily put their 9/16 nuts on loosely, as a precaution to not accidently push them back up into the frame. I then used the Subaru’s scissor jack to slowly lift the hitch, line it up, raise it over the bolts, and install their washers and nuts, first on one side and then the other. I also used an original 16mm tiedown bolt with a supplied 15mm nut to secure the vertical plate on the hitch to one of the three tiedown holes.

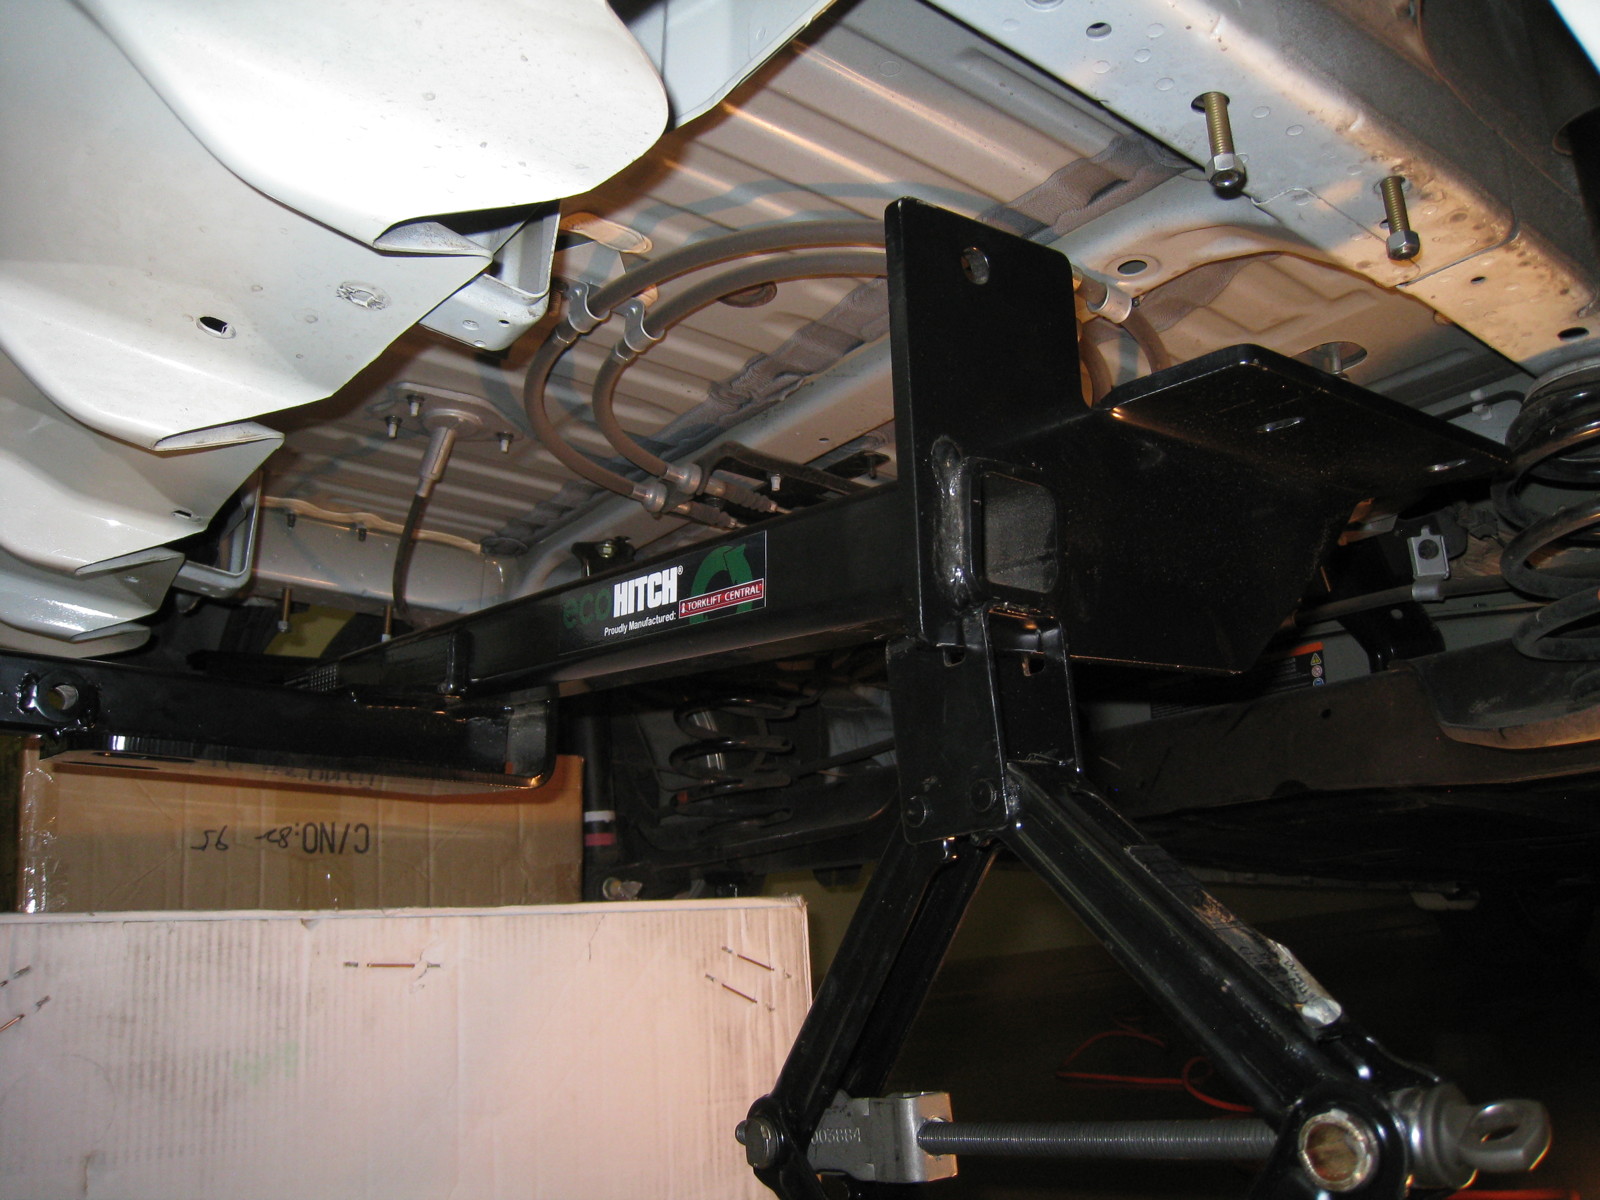
Here is the hitch bolted on securely. Now I needed to reinstall the panel over it.

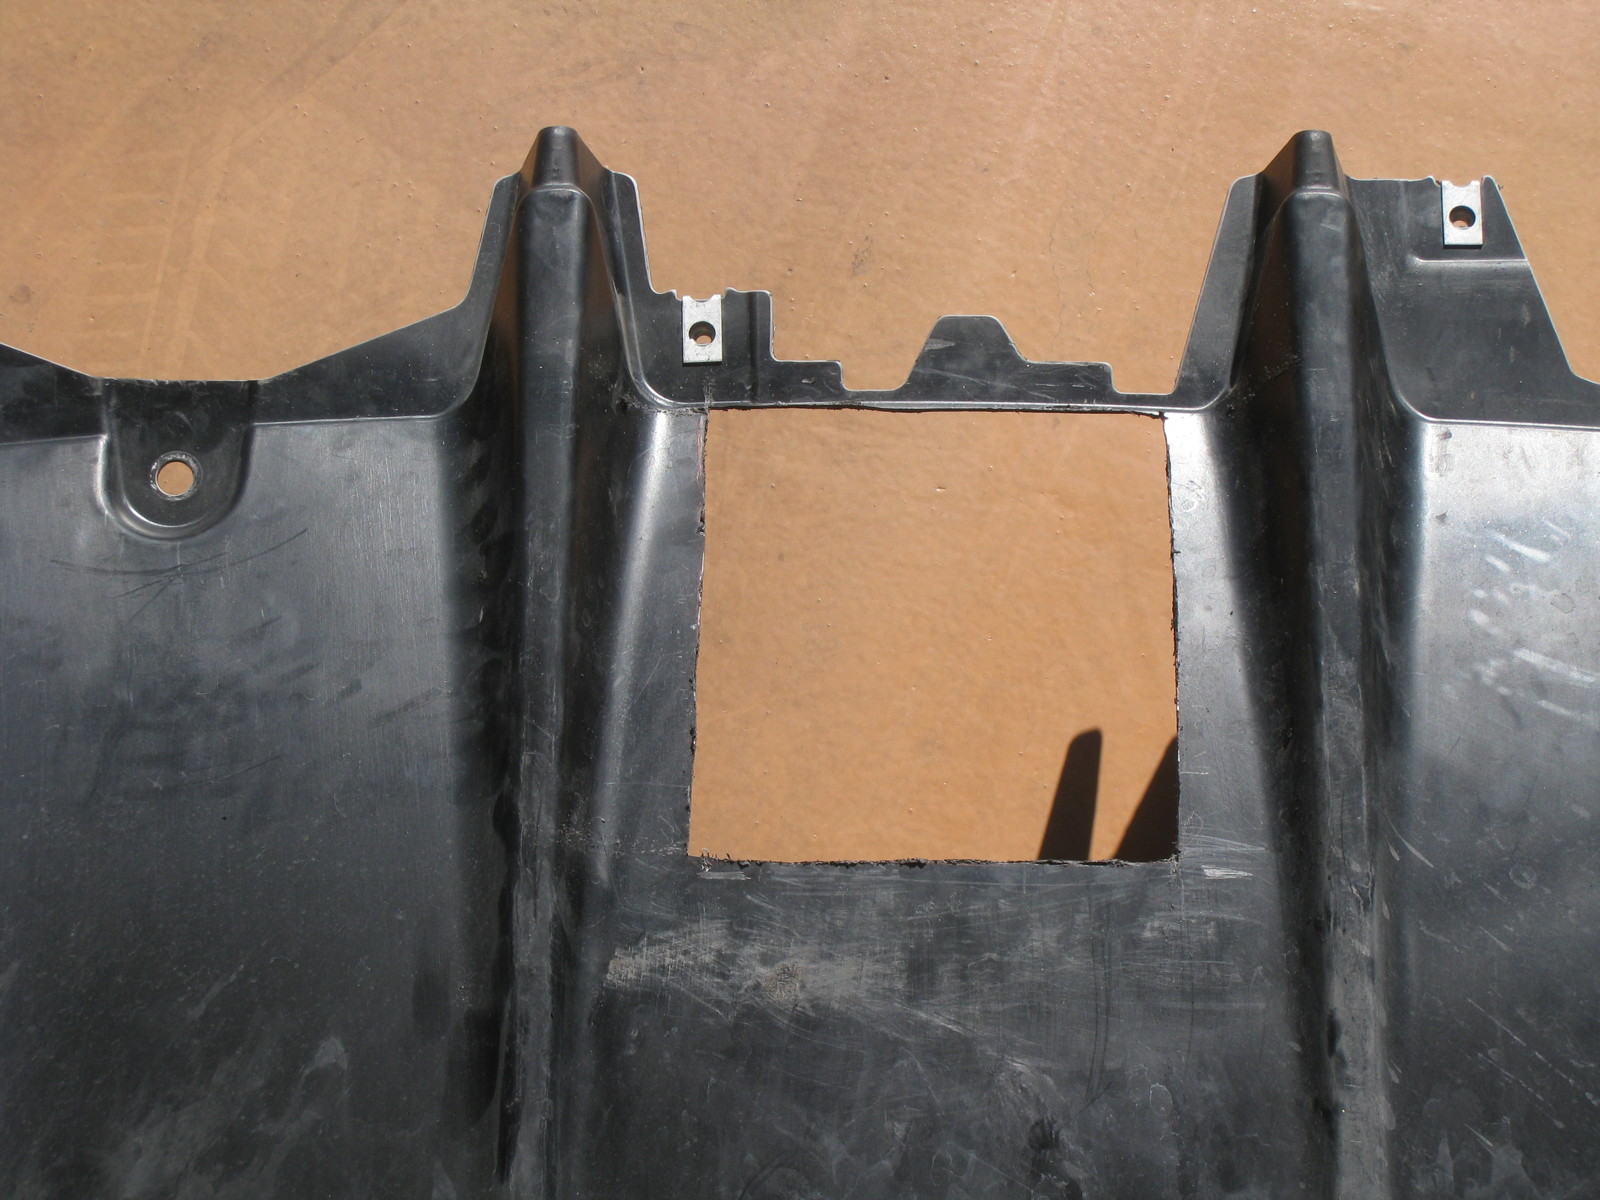
The instructions indicated that I first had to cut a square out of the panel where the receiver tube hangs down. That step specified a 6.25" x 5.5" hole, but the photo showed 6.25" x 6.0" measurements. I asked TorkLift, and they said the photo was correct. I therefore marked off those specifications on the panel. I loathe the idea of cutting into one of my Leaf’s parts, but I nonetheless got out my Dremel, took a deep breath, and... cut away.

Now that I have installed one of these hitches, I would recommend different dimensions for that cutout. As you can see above, the panel could fit around the hitch tube more snuggly. I think that the width of the hole should be 5.5", as indicated in the instructions. And I would actually make the length one or even two inches shorter, farther away from the extreme back edge of the panel. As you can see, the angled piece from the tube to the crossbeam on the hitch is farther back than the 6" long hole. This would make the fit tighter, and also leave a stronger, deeper edge for the panel.

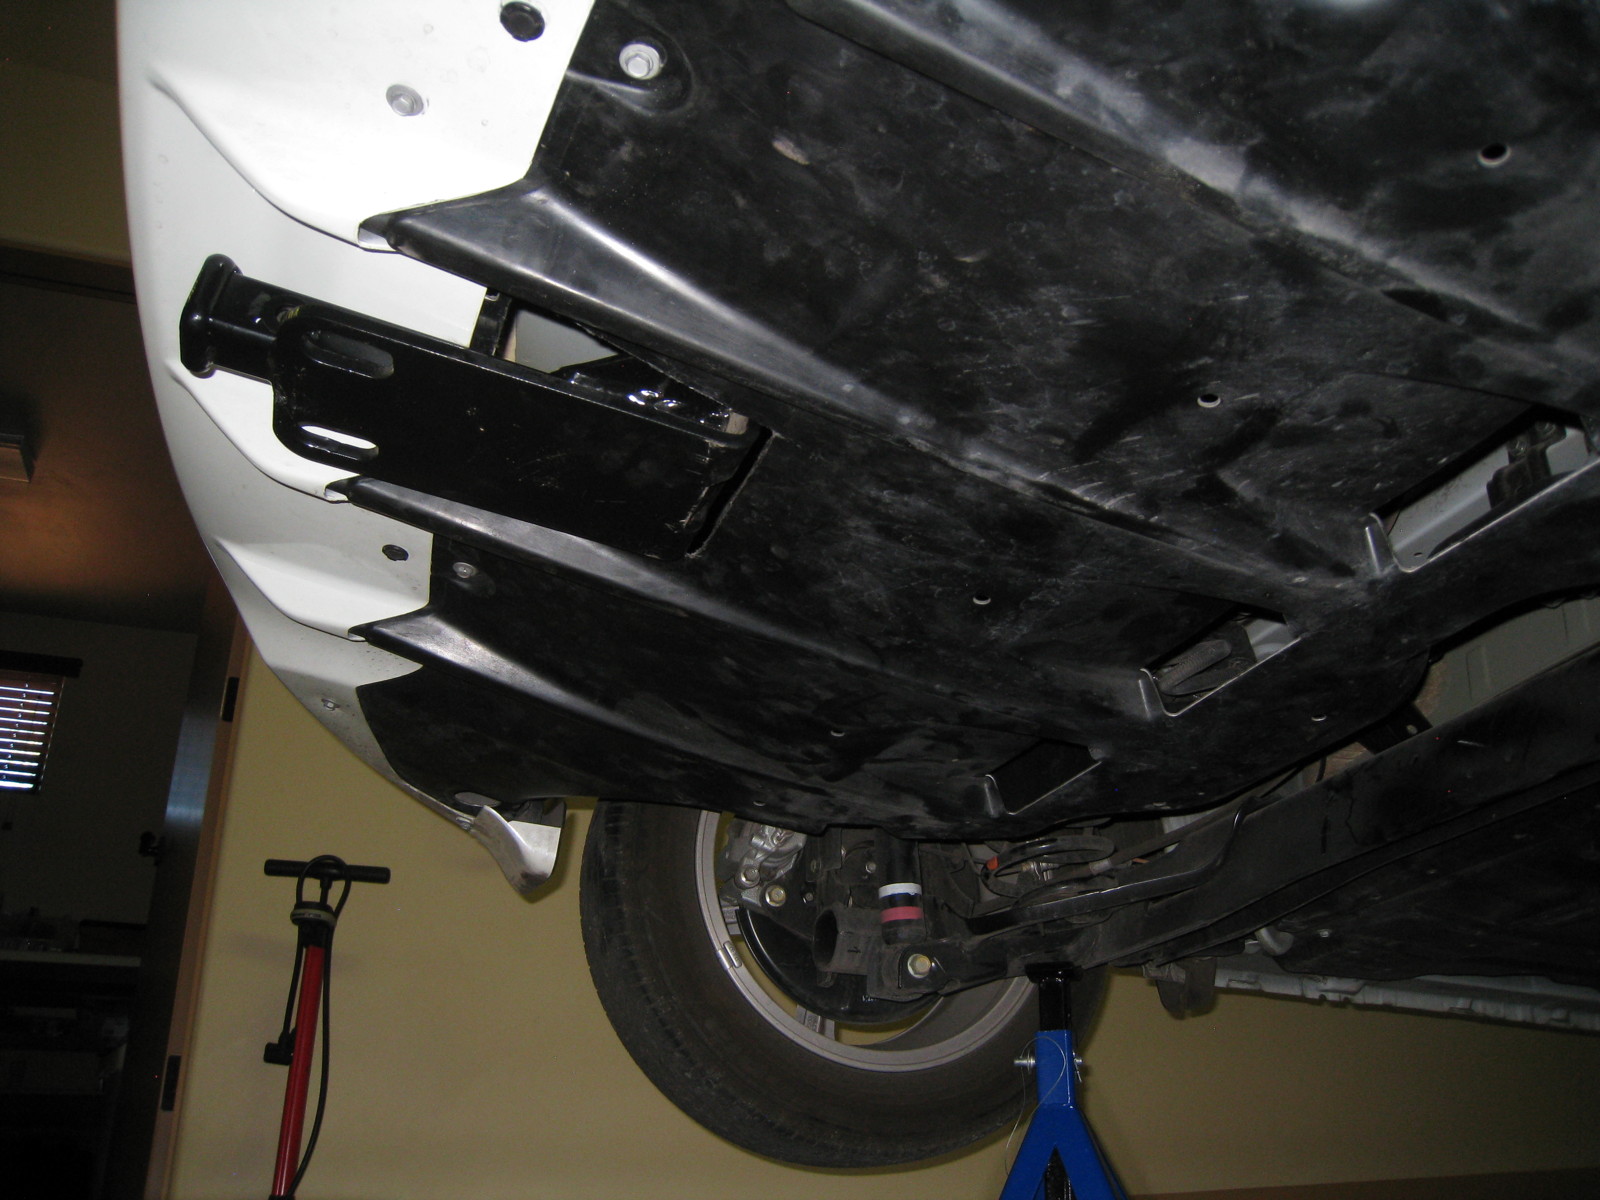
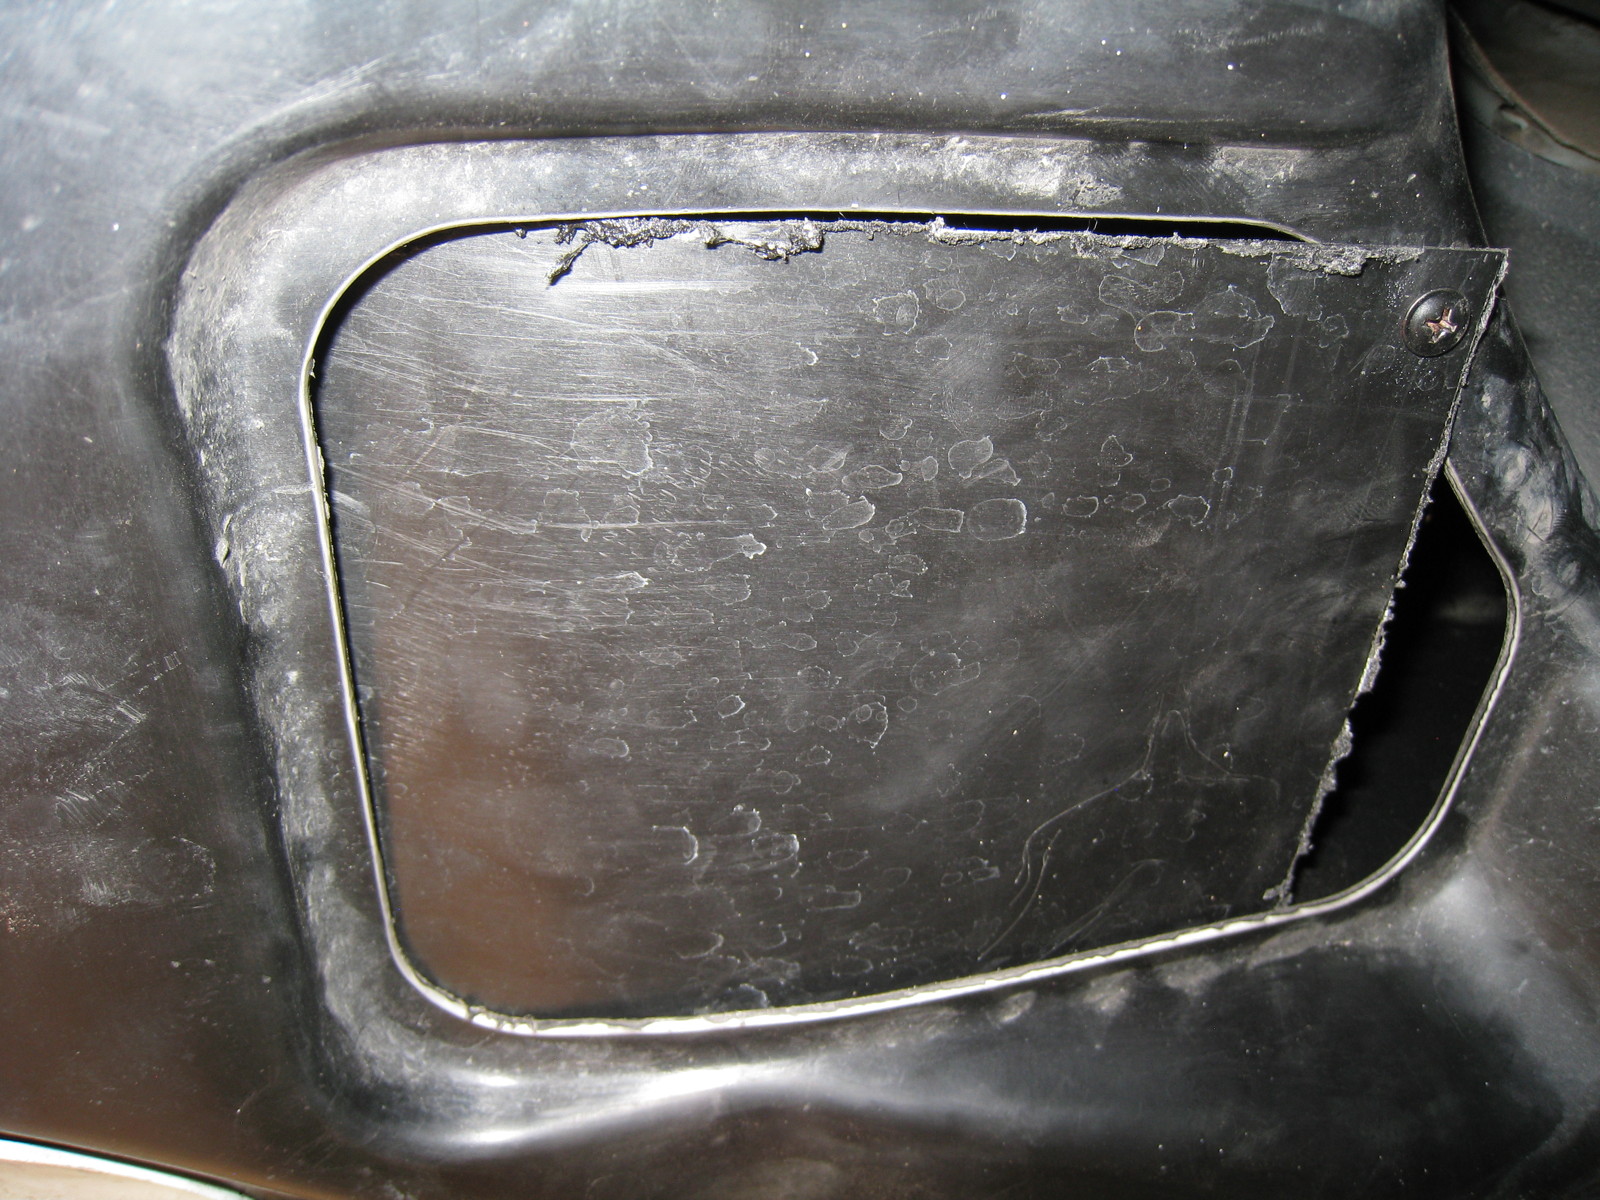
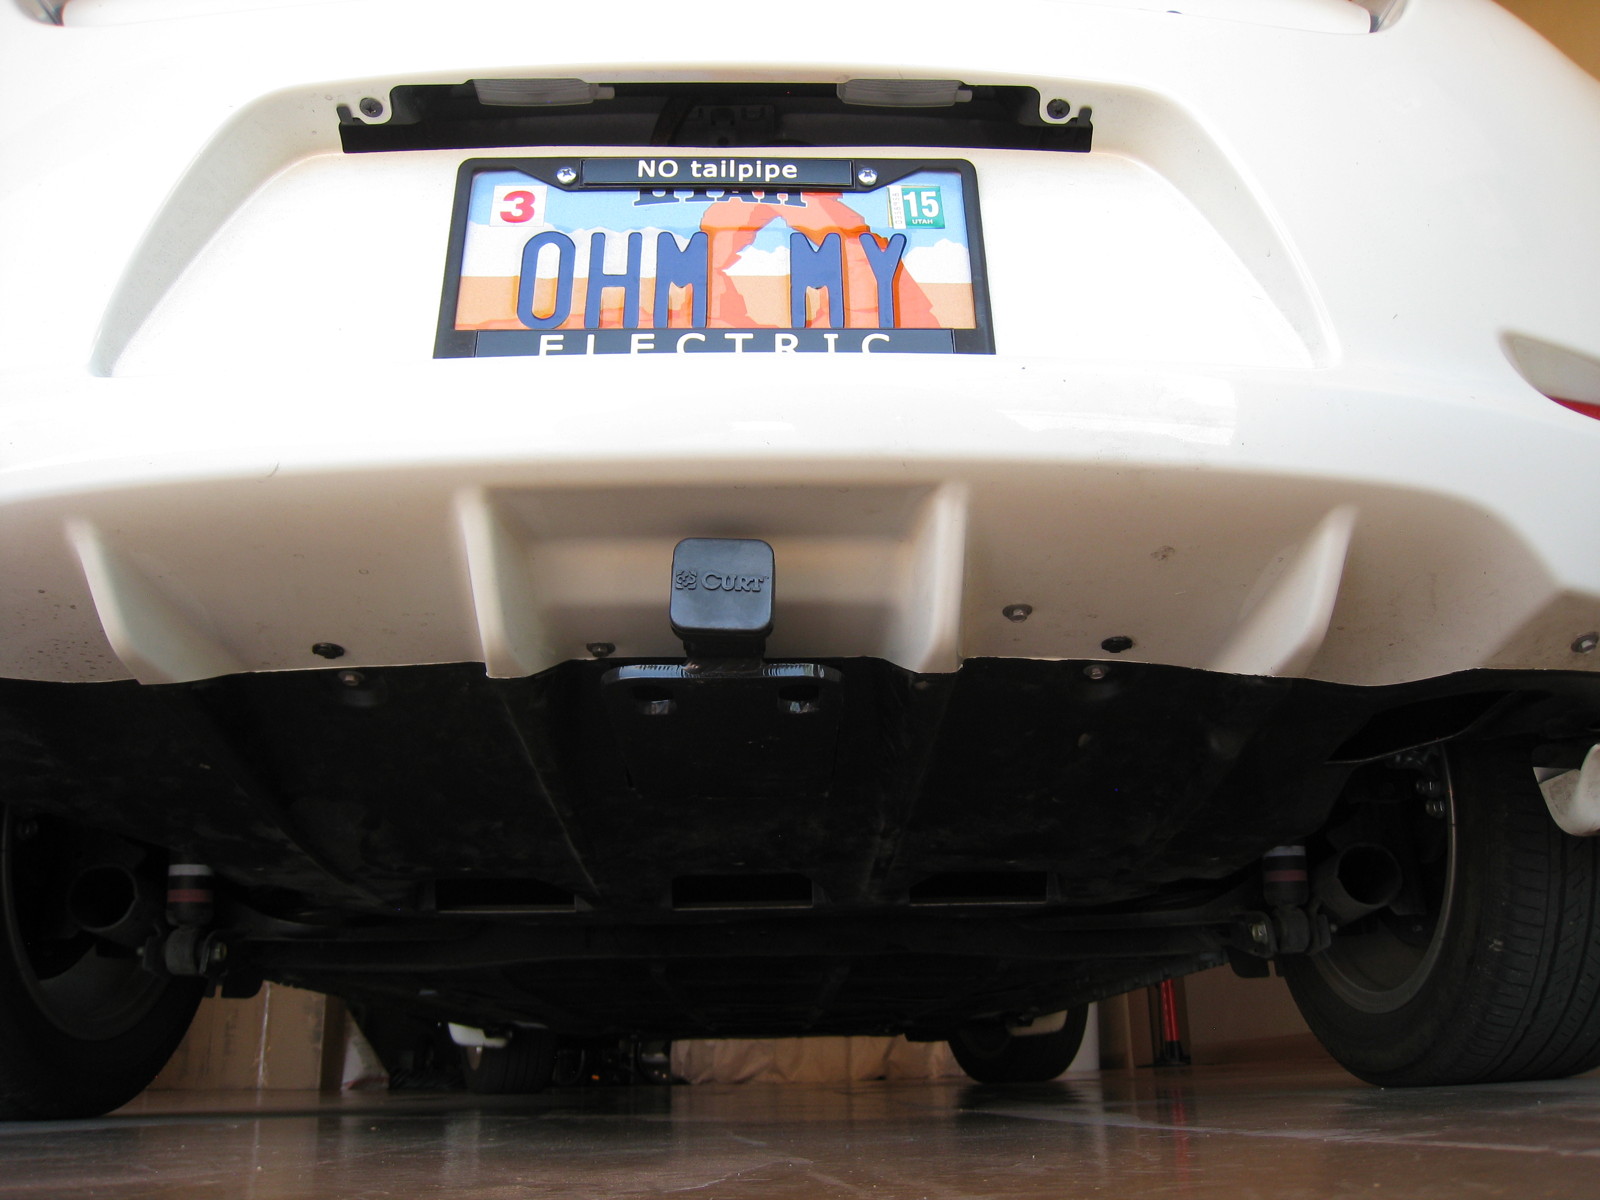
Here the panel has been reinstalled, and the hitch looks very good, hardly even noticeable. Of course, as you can see in the upper right, now that the factory tiedown is missing, its hole is wide open, which will allow even more dirt to swirl up under the panel.

It occurred to me that perhaps I could partially cover that hole with the piece I had cut out of the panel to accommodate the receiver tube. Waste not, want not, right? Sure enough, I could wedge one edge of that piece between the hitch and the panel, and then secure the one protruding corner with a small screw. The piece doesn't cover the hole entirely, but at least it’s not gaping wide open.

There was a final touch missing. The hitch didn’t come with a cap for the tube, so I stopped by an auto parts store and bought a generic one manufactured by Curt. This will help keep dirt, dust, and grime out of the tube when the hitch isn’t being used.

Now came the real test. I mounted our bike rack on the hitch. Here you can see it in its folded up position, should you want to keep it on the car when not hauling bikes.

I doubt that I ever will do that, however. Not only does it make it difficult to get into the cargo area, but the front wheel brace for my semi-recumbent would end up rubbing against the Leaf’s rear bumper, as you can see above. I would rather mount and unmount the hitch whenever we haul our e-bikes than mar my Leaf! (See the subsequent addendum below.)

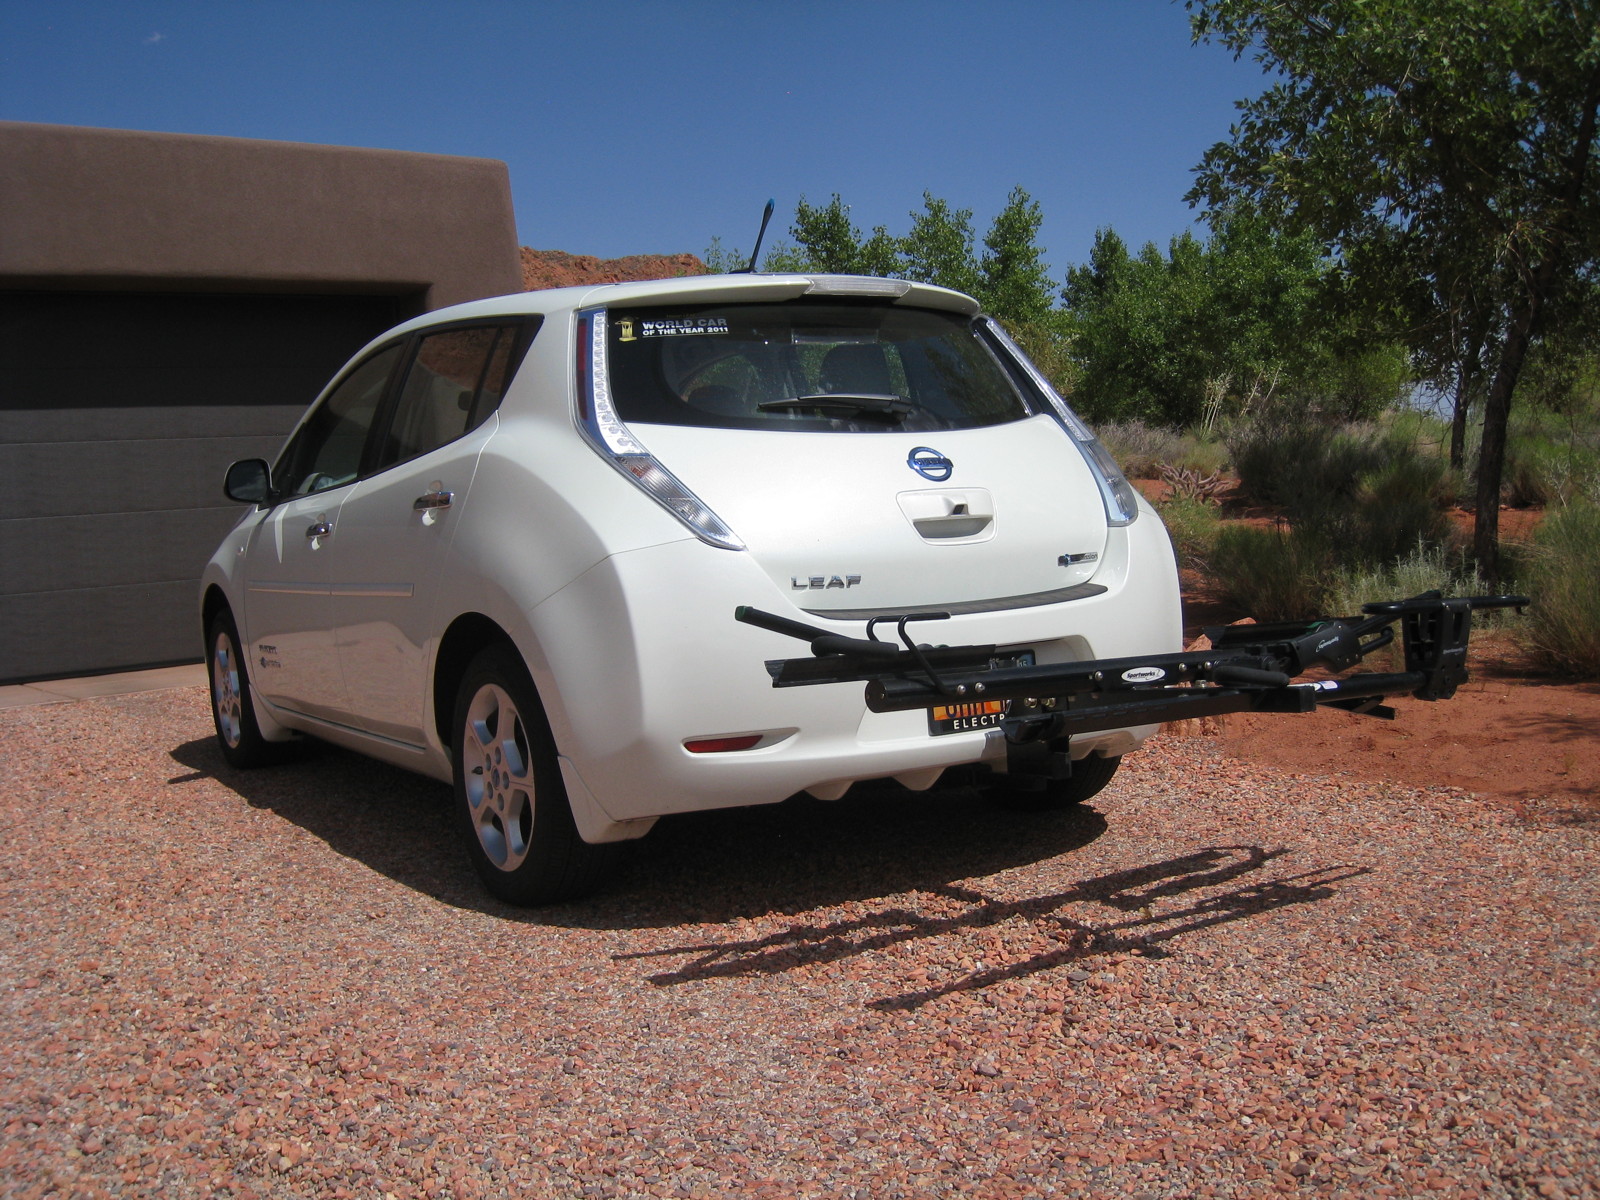
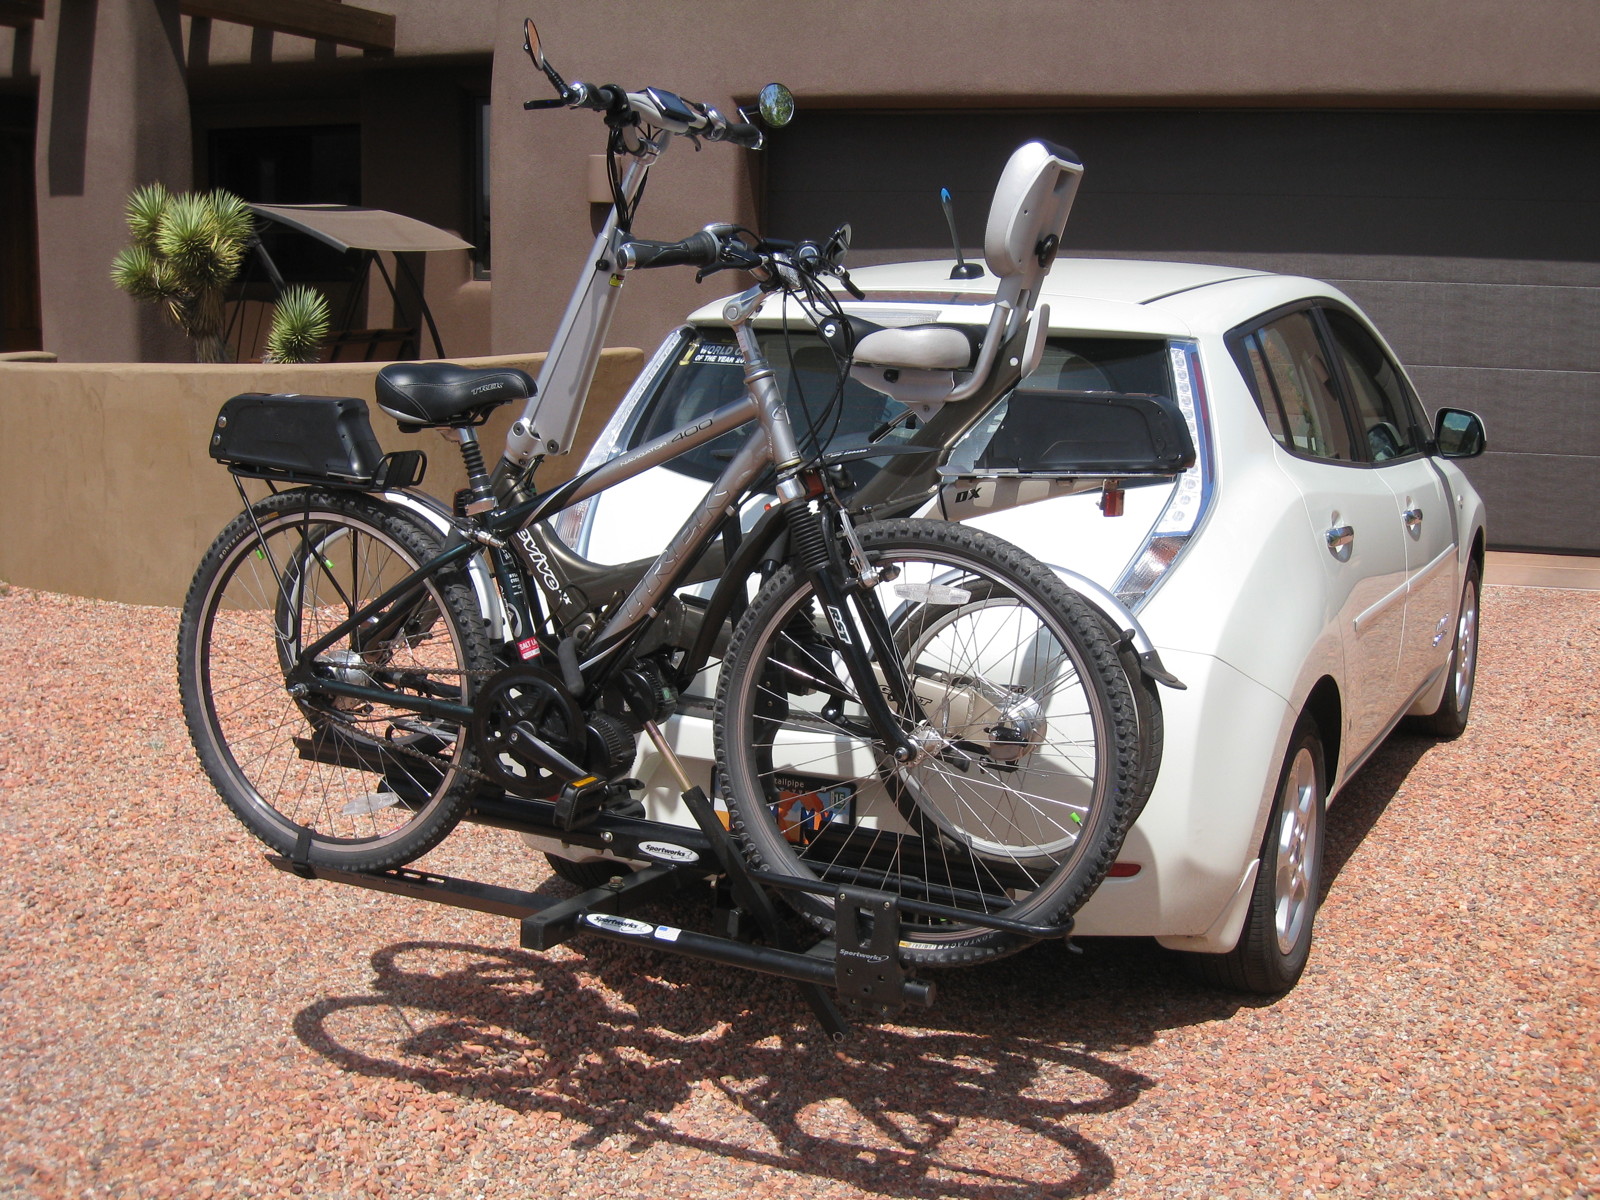
Here is the bike rack folded down, in its intended position to carry bicycles. It does stick out quite a ways, but this is the case with any hitch rack capable of hauling two bikes at once.

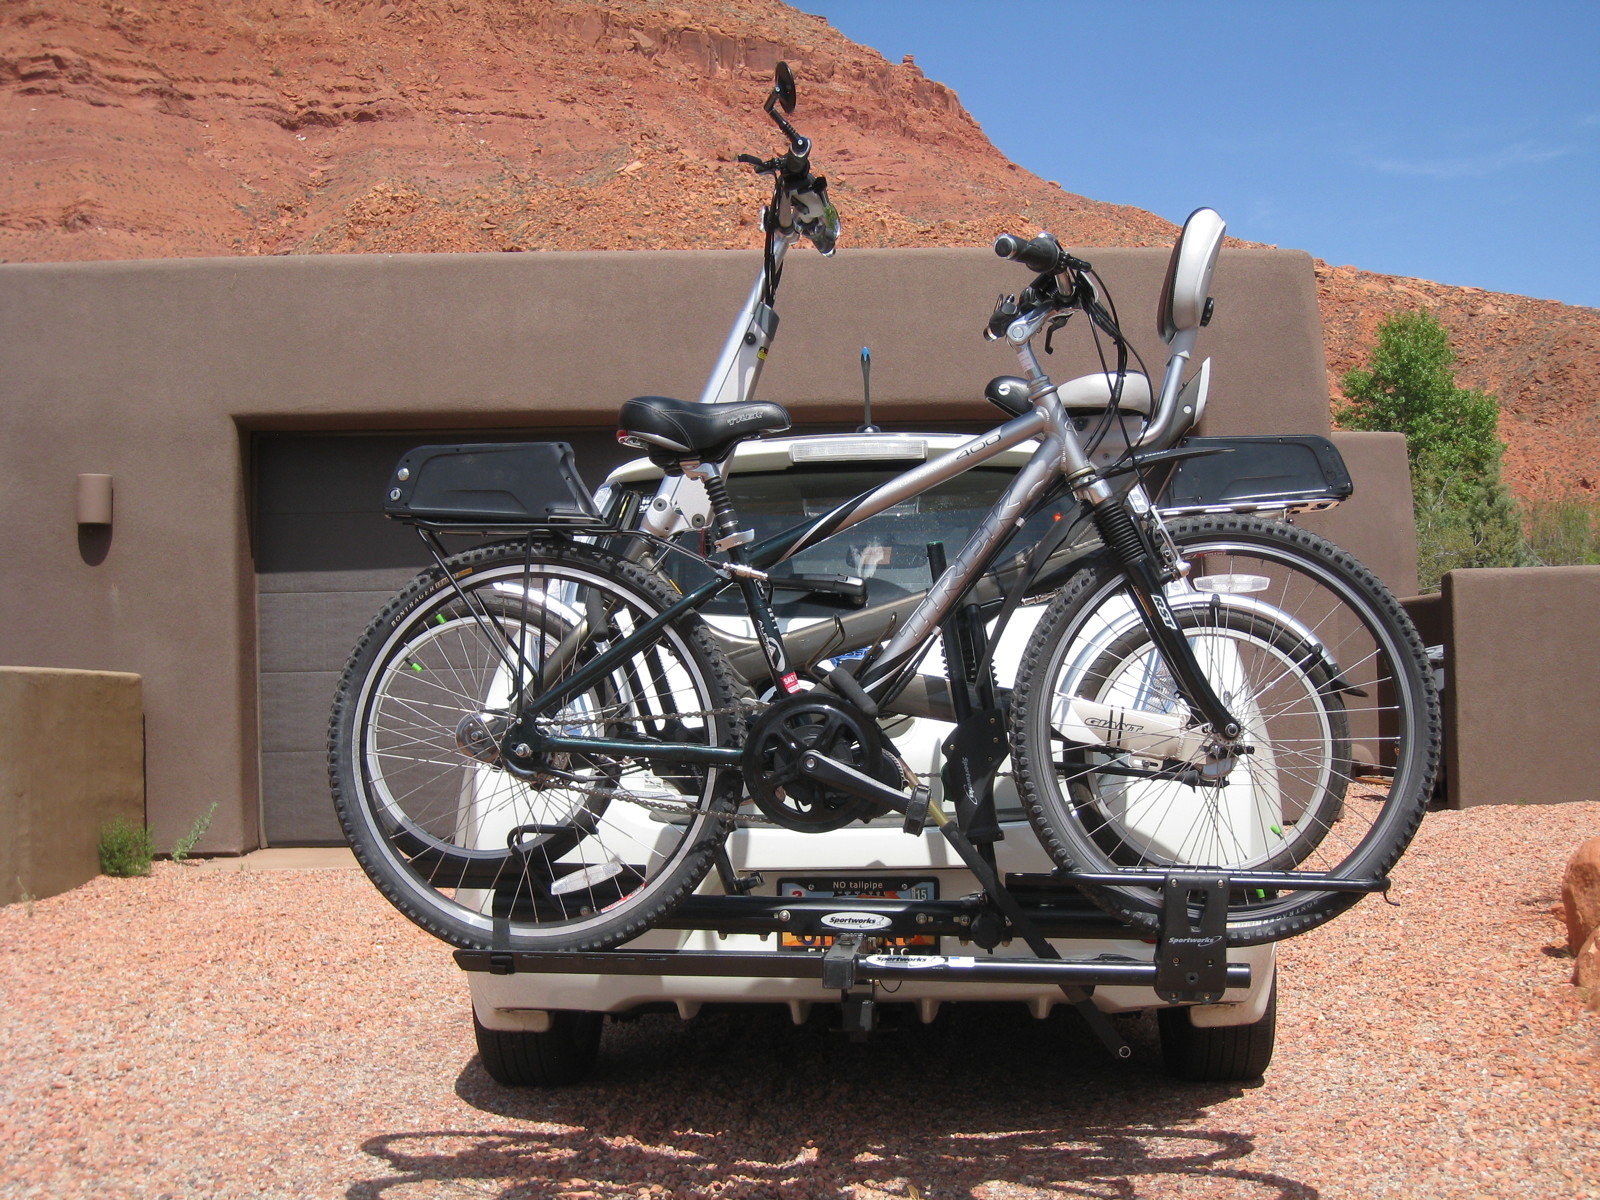
This photo and the one at the top of the page show the e-bikes loaded and tied down. I am very pleased to see that the entire setup works as well on my Leaf as it does on our Subaru. Hitch racks also have distinct advantages over roof racks. You don't have to lift the e-bikes up so high, risking damaging the car, and I can leave them on the rack when pulling in and out of the garage.

From the side you can see that the e-bikes sit very nicely in their trays, without rubbing on each other or the Leaf. Yes, they are heavier than ever, now that they also have electric motors and hefty batteries installed on them, but they are still well within the weight limit of the hitch’s 200-pound tongue capacity.

Visibility through the rear-view mirror is, naturally, a bit limited, but it is still possible to see traffic behind the Leaf, as well as keep an eye on the e-bikes while driving.
The bike trails are beckoning! I will have to post some more road trips as we explore them in the future. And like I have joked previously, when passersby ask me about the Leaf, if I am carrying the e-bikes on their rack, I can respond that, just in case we ever run out of charge on the highway, they could serve as our... range extender!
Jesting aside, however, if and when someone actually starts producing a long-ranger trailer, like the prototype for the RAV4-EV, the Pru, Phil Sadow’s propane turbo, the EP Tender, or the Nomadic... I already have a hitch to tow it.
Addendum
I subsequently purchased a receiver extender so that I can now leave the bike rack on the Leaf without it rubbing on the rear fender.